CI/CD Automation for Splunk Apps using GitHub Actions, Part 2
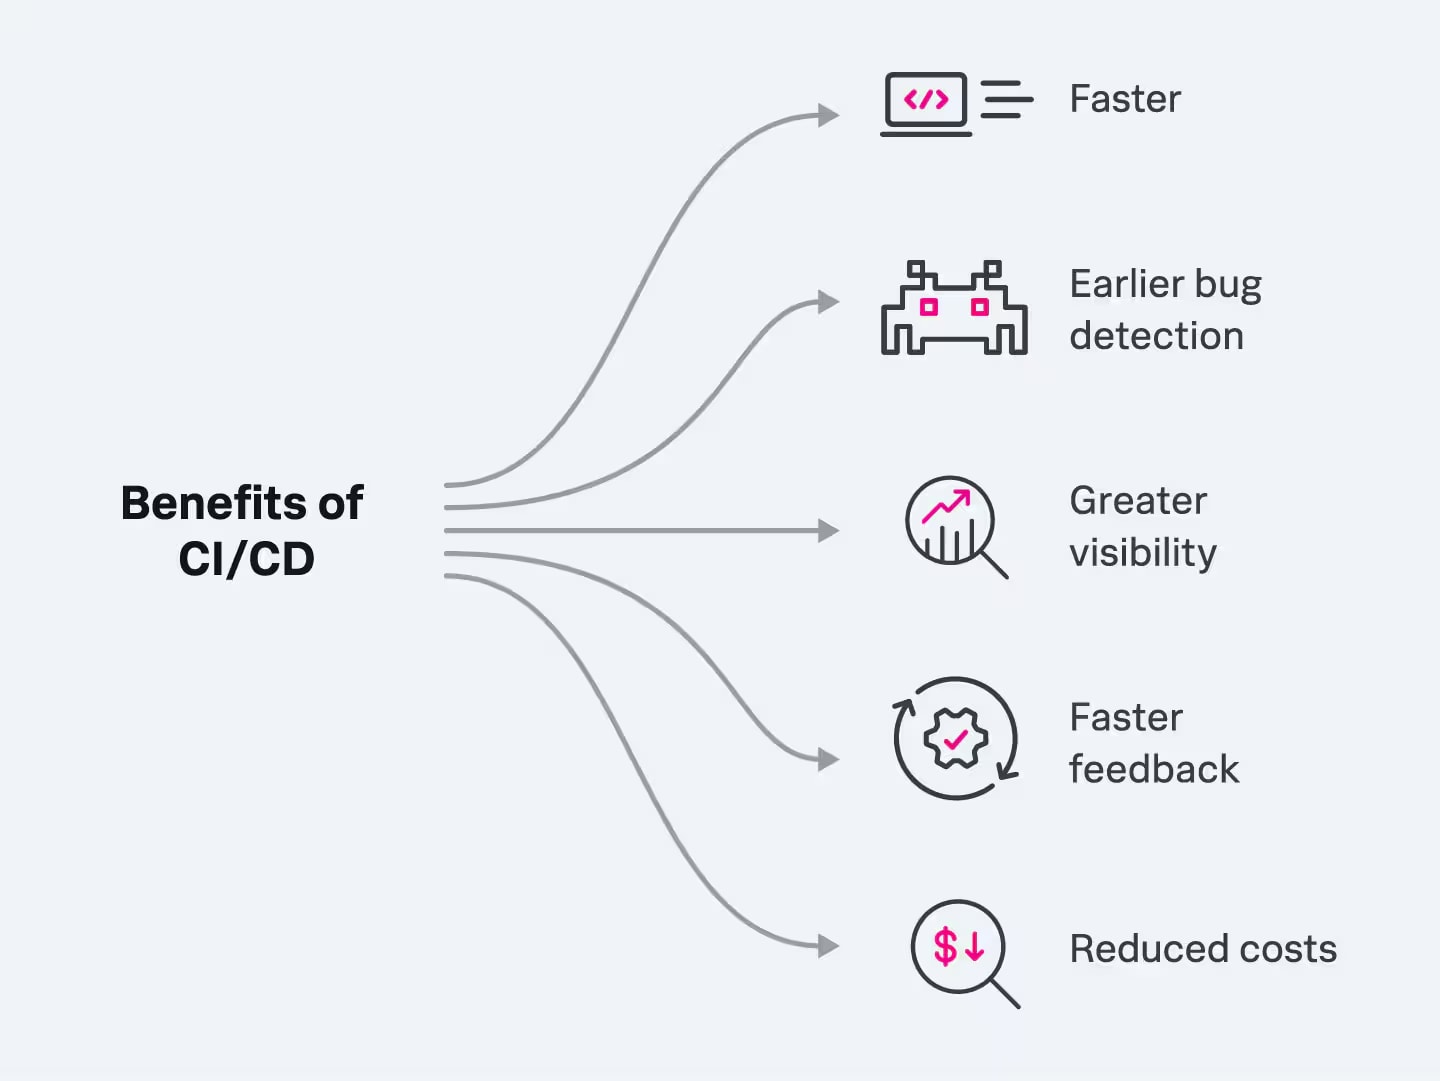
Do you want to speed up the testing and deployment of your Splunk apps? If you're a Splunk app developer, you can use automation to set up workflows to validate your code automatically. You can control how servers perform your unit tests for you while switching between versions of Splunk Enterprise. And when you're ready, you can use these automatic tools to build your releases. All this automation not only reduces your manual workload but makes it much easier to collaborate with a team when building Splunk apps.
This blog is part 2 in our ‘DevOps for your Splunk App’ series. To be ready for this part, you should already have a Splunk App checked into GitHub, with GitHub Actions set up to package your app. If you need to complete those steps, just follow Part 1 before proceeding to the steps below.
Next, you'll add these jobs to your automation:
- Add a job to test our app using Appinspect CLI and output the JSON report
- Add a job to test our app using Appinspect API and output the HTML report
- Run tests with different versions of Splunk Enterprise in separate Docker containers and install a version of Splunk given as an argument (in our case 9.0 and 9.2.1)
- Upload the test framework report in HTML format as an artifact
- Create an app release using automation tokens and tags
More DevOps for your Splunk App
Continuous Integration/Continuous Deployment (CI/CD) is the DevOps approach you're using to accomplish all this automation. Specifically, this example is based on Git source control, synchronized with a GitHub repository on the Web, running GitHub actions. There are other systems available to Splunk app developers that do essentially the same thing but with different tools, such as GitLab or CircleCI. But you should be able to easily transfer the principles shown here to any similar environment by changing syntax and other details.
AppInspect CLI
Presuming your CI/CD system is already set up as shown in Part 1, next set up a job to automatically validate your Splunk app code using Splunk AppInspect. To reorient you to where we left off in part 1, you should have a GitHub page linked to your local Git repository for your Splunk app code, https://github.com/yourname/devtutorial-conf24 (where your name is your GitHub account name).
From there, you should be on the Actions tab and have the main.yml file open. The jobs you created in part 1 should all be there and should run successfully when you commit code. And remember, if you can't get things to run as shown, or have any trouble copying/pasting, you can double-check your code against the sample provided in this repo: https://github.com/bdebek-splunk/devtutorial-conf24-final.
Now, add another job to your GitHub actions by adding the following to the bottom of your main.yml file:
run-appinspect:
  runs-on: ubuntu-latest
  needs: build
  steps:
    - name: Checkout Repository
      uses: actions/checkout@v2

    - name: Download package
      uses: actions/download-artifact@v4
      with:
        name: my-package
        path: app-dir/

    - name: Install system packages
      run: |
        sudo apt update -qq
        sudo apt install -y python3-pip
        sudo pip install splunk-appinspect

    - name: Run AppInspect
      run: |
        ls -la .
        ls -la app-dir/
        FILE_NAME=$(ls -1 app-dir/)
        splunk-appinspect inspect app-dir/$FILE_NAME --output-file appinspect_result.json --mode test

    - name: Upload appinspect report
      uses: actions/upload-artifact@v4
      with:
        name: appinspect report
        path: appinspect_result.json
To explain what's there:
- The job is named run-appinspect.
- It uses the ubuntu-latest server, as with your other jobs.
- When code is checked out (the job named Checkout Repository), it uses actions/checkout@v2.
- To download the package created by your earlier packaging job, it uses the actions/download-artifact@v4.
- To be able to use Splunk AppInspect, you must install it into the Ubuntu runner. The step Install system packages installs python3-pip and splunk-appinspect.
- To run Splunk AppInspect, the step Run AppInspect gets the file name of your package and passes it to a call to splunk-appinspect, along with other parameters.
- When the Splunk AppInspect test is complete, the step Upload appinspect report sends the produced report (artifact) to GitHub with actions/upload-artifact@v4.
Next, save and commit your changes. After the new action successfully runs, you should have access to the new JSON Splunk AppInspect report.

You can download it, unzip it, and open the JSON file. Reports in this format are intended for code processing but are not really convenient for people to read. So, next, you can try another report format and also use the API version of Splunk AppInspect.
Splunk AppInspect API
This time, instead of using the Splunk AppInspect CLI, you will connect to a Splunk service using your Splunk credentials. First, add a new job at the bottom of the main.yml file:
run-appinspect-api:
  needs: build
  runs-on: ubuntu-latest
  steps:
    - uses: actions/checkout@v3
    - uses: actions/download-artifact@v4
      with:
        name: my-package
        path: app-dir/
    - name: appinspect-api
      uses: splunk/appinspect-api-action@v3.0
      with:
        username: ${{ secrets.SPL_COM_USER }}
        password: ${{ secrets.SPL_COM_PASSWORD }}
        app_path: app-dir/
    - uses: actions/upload-artifact@v4
      if: always()
      with:
        name: appinspect-api-html-report
        path: AppInspect_response.html
Note, there are two secret variables not yet defined: SPL_COM_USER and SPL_COM_PASSWORD. These will contain your Splunk.com (not your Splunk Enterprise) credentials; your www.splunk.com username and password, respectively.
First, save and commit the changes (the job will fail because these credentials were not yet given, but don’t worry about that for now).
Next, go to repository Settings. Under the Security tab, select Secrets and variables then select Actions. On this page, add two repository secrets with corresponding values, for example: Name: SPL_COM_USER, Secret: myusername@email.com. Enter your Splunk.com email address and your password for SPL_COM_PASSWORD.
Run the action again to see the results. You should receive the HTML report, which is formatted for easy reading by people.


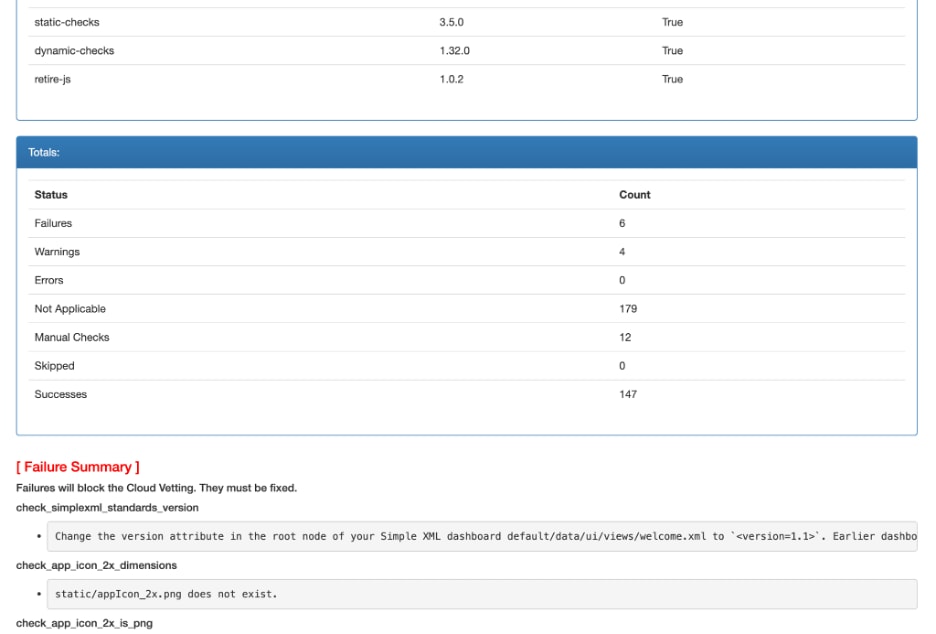
A workflow job will fail if it encounters an unexpected failure during a Splunk AppInspect check. To make the job ignore failures, create a file .appinspect_api.expect.yaml in the main repository directory. To do this, right-click on the left-hand panel, then select Create file… Add the following code to .appinspect_api.expect.yaml:
check_simplexml_standards_version:
  comment: expected
check_app_icon_2x_dimensions:
  comment: expected
check_app_icon_2x_is_png:
  comment: expected
check_app_icon_dimensions:
  comment: expected
check_app_icon_is_png:
  comment: expected
check_ignored_parameters_v2_command:
  comment: expected
check_basic_readme:
  comment: expected
check_for_binary_files_without_source_code:
  comment: expected
check_for_compiled_python:
  comment: expected
Commit and push again, and the Splunk AppInspect API job should conclude successfully.
That's it for code validation with Splunk AppInspect. Next, you'll add a framework to conduct testing with different versions of Splunk Enterprise.
Unit Tests
In this step, you'll add an external Bash script to be run by the workflow to perform these actions:
- Spin up a Docker container and install a version of Splunk given as an argument. In this example, both versions 9.0 and 9.2.1.
- Copy repository contents to the Splunk Apps directory.
- Perform unit test checks for:
- App has been installed correctly.
- Custom search command outputs the correct result.
- Knowledge objects return correct results.
- Upload the Pytest report in HTML format as an artifact.
The sample app and unit tests used in this example are somewhat trivial, but the point is to set up the testing framework successfully with GitHub Actions. You should then be able to extend code for more meaningful tests specific to your own Splunk app and deployment.
Create a Bash Script to Run with GitHub Actions
Using the techniques already shown for other files, create an app_test.sh file in your .github/workflows directory. Then, copy into it the code from this file: https://github.com/bdebek-splunk/devtutorial-conf24-final/blob/main/.github/workflows/app_test.sh
Normally, you would also need to set up a Pytest script and data samples in the tests/knowledge directory. As you might have noticed, this is also already done for you in the sample repository: https://github.com/bdebek-splunk/devtutorial-conf24-final/tree/main/tests/knowledge
Copy that tests/knowledge folder to your GitHub repository as a peer to your .github/workflows folder, so that you have the same folder structure.
You should now have all the folders and files needed for the Pytest framework and samples for this example. There's a lot you could learn and do with Pytest and unit testing, which goes beyond the scope of this blog. Meanwhile, back to the unit testing of your Splunk app.
Run Tests Against Different Splunk Enterprise Versions
The next step is to add the job code below to the bottom of your main.yml workflow file. It checks out your repository and then runs your app_test.sh script against Splunk Enterprise version 9.0 and version 9.2.1, depending upon the job. At completion, each uploads to GitHub the Pytest report as an artifact.
test-v9:
  needs: build
  runs-on: ubuntu-latest
  env:
    SPLUNK_VERSION: "9.0"
  steps:
    - name: Checkout Repository
      uses: actions/checkout@v2

    - name: Download package
      uses: actions/download-artifact@v4
      with:
        name: my-package
        path: app-dir/

    - name: Install packages
      run: |
        sudo apt update -qq
        sudo apt-get install -y jq

    - name: Test On Splunk 9.0
      run: |
        chmod +x .github/workflows/app_test.sh
        .github/workflows/app_test.sh $SPLUNK_VERSION
test-v9-2-1:
  needs: build
  runs-on: ubuntu-latest
  env:
    SPLUNK_VERSION: "9.2.1"
  steps:
    - name: Checkout Repository
      uses: actions/checkout@v2

    - name: Download package
      uses: actions/download-artifact@v4
      with:
        name: my-package
        path: app-dir/

    - name: Install packages
      run: |
        sudo apt update -qq
        sudo apt-get install -y jq

    - name: Test On Splunk 9.2.1
      run: |
        chmod +x .github/workflows/app_test.sh
        .github/workflows/app_test.sh $SPLUNK_VERSION

    - name: Upload pytest report
      uses: actions/upload-artifact@v4
      with:
        name: pytest-report
        path: ${{ github.workspace }}/pytest-report.html
Commit and push your changes, and you should be able to see these jobs run. You can check out their Pytest reports too. Again, the testing shown here is fundamental, mainly showing how to set up the framework and run testing jobs. But given this start, you could learn more about test frameworks to perform more meaningful tests specific to your apps.
Finally, you'll create a release for your Splunk App in GitHub.
Release
In this step, you'll create an app release job with an appropriate version number in GitHub. The steps are:
- Create an automation token in GitHub.
- Add a new job in the main.yml file.
- Pull the remote repository.
- Make some local changes, commit the code.
- Create the tag.
- Push the repository to remote with the tag attached.
First, add the release job to the bottom of your main.yml file:
release:
  if: startsWith(github.event.ref, 'refs/tags/v')
  needs: [test-v9, test-v9-2-1, run-appinspect]
  runs-on: ubuntu-latest
  steps:
    - uses: actions/checkout@v2
    - name: Create a Release
      uses: elgohr/Github-Release-Action@v5
      env:
        GH_TOKEN: ${{ secrets.AUTOMATION_TOKEN }}
      with:
        title: ${{ github.ref_name }} release
There are some conditions on when this job should run so it will not trigger every time. The condition if: startsWith(github.event.ref, 'refs/tags/v') runs only if the commit is pushed with a tag starting with “v”.
The needs: [test-v9, test-v9-2-1, run-appinspect] line indicates that the job will not run unless the listed jobs have finished successfully.
First, commit and push the changes above to main.yml, but the Release job will not run yet.
Then create the referenced AUTOMATION_TOKEN:
- Go to your profile settings by clicking your profile picture in the top right corner of the GitHub page and clicking Settings.
- Go to Developer Settings at the bottom.
- Select Personal access tokens and then Tokens (classic), Generate new token (classic).
- Enter “GitHub automation” in the top field, then pick these permissions:
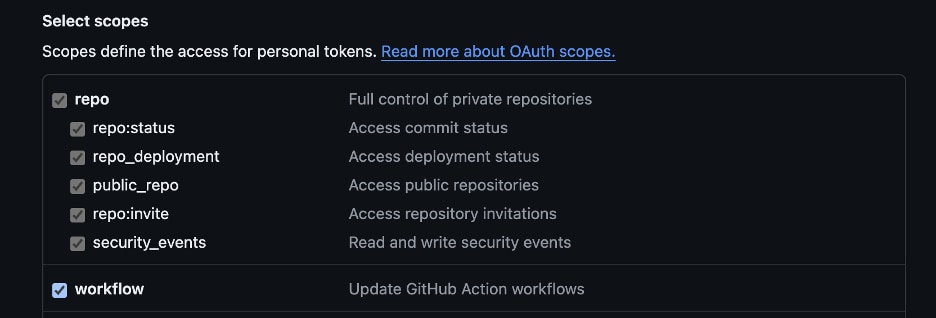
- Click Generate Token
- You can now copy the generated token:

- Add it as a secret variable (the same as we added for Splunk username and password), this time naming it AUTOMATION_TOKEN.

Next, go back to your terminal and make some changes locally:
For the release job to execute, we need to pull our repository changes to the local repo and then make some local changes. We will add a line of text to the README document:
git pull origin
echo "I love Git" >> README.md
Then, execute the commands below to stage changes, commit them, create a tag, and push the code to the remote repository:
git add .
git commit -m "commit message"
git tag v1.0.0
git push origin main v1.0.0
After the pipeline finishes executing, your release should be ready!
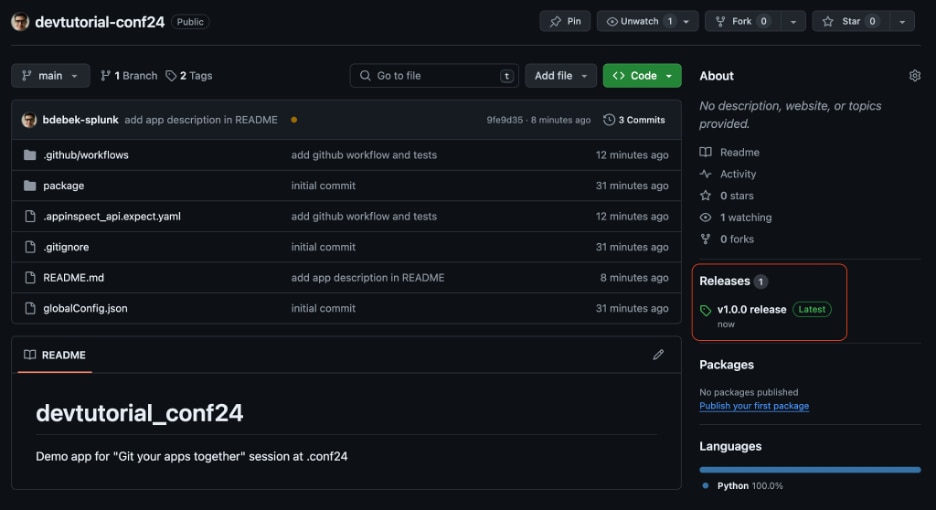
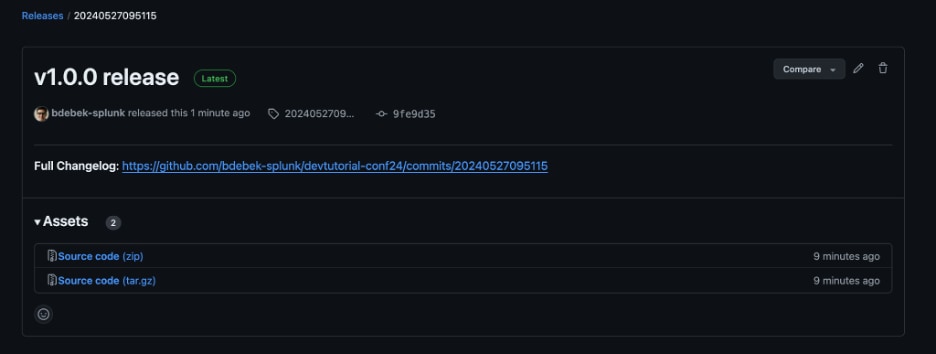
You should now see this in your Actions tab:

That's all there is to it for setting up workflows with validation, testing, and release jobs with GitHub Actions. Congratulations!
As you can see, GitHub actions are easy to use, powerful and efficient when properly set up. With your Splunk app code stored in a fully source-controlled, DevOps-automated CI/CD framework, you can really improve your software engineering processes. Automatic testing and building raises the quality of your code, and should free more time for every contributing app developer to collaborate on other tasks.
More information
Here are more blogs and sites if you'd like to learn more about the technologies shown in this exercise:
- CI/CD Automation for Splunk Apps using GitHub Actions, Part 1
- CI/CD backgrounder
- GitHub runners
- GitHub actions
- Ubuntu commands
- Splunk AppInspect
- Bash scripts
- Docker containers
- Pytest testing framework
If you have any questions reach out to us on #appdev (Join Slack here). And don’t forget to sign up to get important and exciting Splunk Developer news + content right in your inbox!

