Configuring Microsoft’s Active Directory Federation Services (ADFS) Security Assertion Markup Language (SAML) Single Sign On (SSO) with Splunk Cloud

 The title is definitely a mouth full…. It is easier to say “Configure ADFS SAML SSO with Splunk> Cloud“, that’s for sure, but we did get all of the definitions of acronyms down in one shot….
I’ve put together a couple of blog postings now on SAML configurations for Splunk> Cloud. One for Okta , one for Azure. ADFS is definitely a bit more involved than those other two Identity Providers (IdP), and can be a bit more tricky depending on your implementation, but with this following guide, you should be well on your way to integrating ADFS to your Splunk> Cloud instance!
I am a Cloud Services Advisory Engineer on the Customer Adoption and Success Team (CAST) within Splunk>. My focus is to assist our customers in their experience with our Cloud service for Splunk>. With our 6.4.x version of Splunk> Cloud, which this posting is about. The configuration for SAML definitely works quite well, but is not the most user friendly to configure. As well, which we will get into later, if you choose to sign your SAML Authorization Requests and Responses, and you have a certificate within your IdP that is signed by a 3rd party Certificate Authority (CA) such as Verisign, GeoTrust, GoDaddy, etc., then you will require the assistance of Splunk> Cloud Operations (Ops) in order to have your certificates put into place.
So let’s get started!
Who do you need?
- An administrator for your ADFS environment.
- An administrator for your local Identity Management system (Active Directory most likely)
- An administrator for your Splunk> Cloud instance. If they’re all the same person (you), you’re in luck. Otherwise you’ll have to run the calendar dice and find time for you all to discuss SAML integration, put in change control, scheduled a time to implement, etc.
- Splunk> Ops (if you have a 3rd party signed CA or need any customization (claim rules) in your environment
ADFS Integration:
The following steps are specific to versions 6.4.x of Splunk> Cloud. ADFS is not supported under earlier versions of Splunk> Cloud.
- First have your Splunk> Cloud administrator log into your instance as a user with the ‘admin‘ role.
If you have multiple search heads in your Splunk> Cloud environment (aka a general search head at ‘https://<acme>.splunkcloud.com and/or possibly an Enterprise Security search head at https://<es-acme>.splunkcloud.com) you will need to perform a separate ADFS integration for each search head independently. In short, you’ll have multiple ADFS Relying Trusts, one for each search head (or search head cluster).

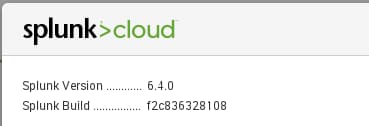
- Confirm that your instance is at version 6.4.0 or later by going to the top menu option ‘Support & Services‘ -> ‘About
- Obtain your search head’s metadata.
This can be obtained by, once logged into a session as an admin role user, entering the URL https://<acme>.splunkcloud.com/saml/spmetadata into your browser’s URL field.
Something similar will be presented in your browser window: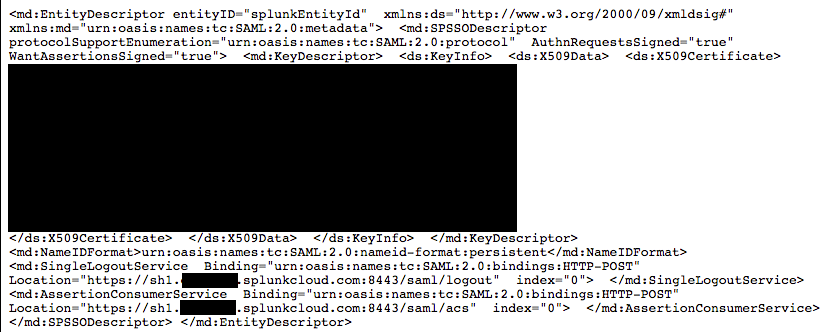
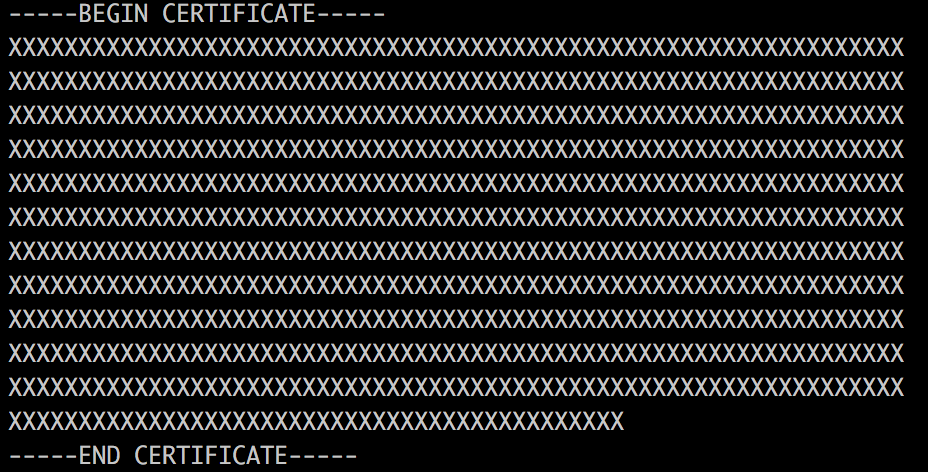
Save the metadata file into an XML file. You can either copy/paste the entire page into a text editor (such as Notepad) that does not format the text, or you can simply do a browser File->Save As action and save the page as an <filename>.xml file. It is very important that the file be straight text with no formatting or it will not upload into ADFS cleanly.From the metadata, capture the search head’s certificate (masked out above, between the XML tags ‘<ds:X509Certificate>‘ and ‘</ds:X509Certificate>‘. Save the certificate into a non-formatted text file (Notepad for example) and place a row above the certificate with the text ‘—–BEGIN CERTIFICATE—–‘ and a row below the certificate with the text ‘—–END CERTIFICATE—–‘. It should look something similar to:
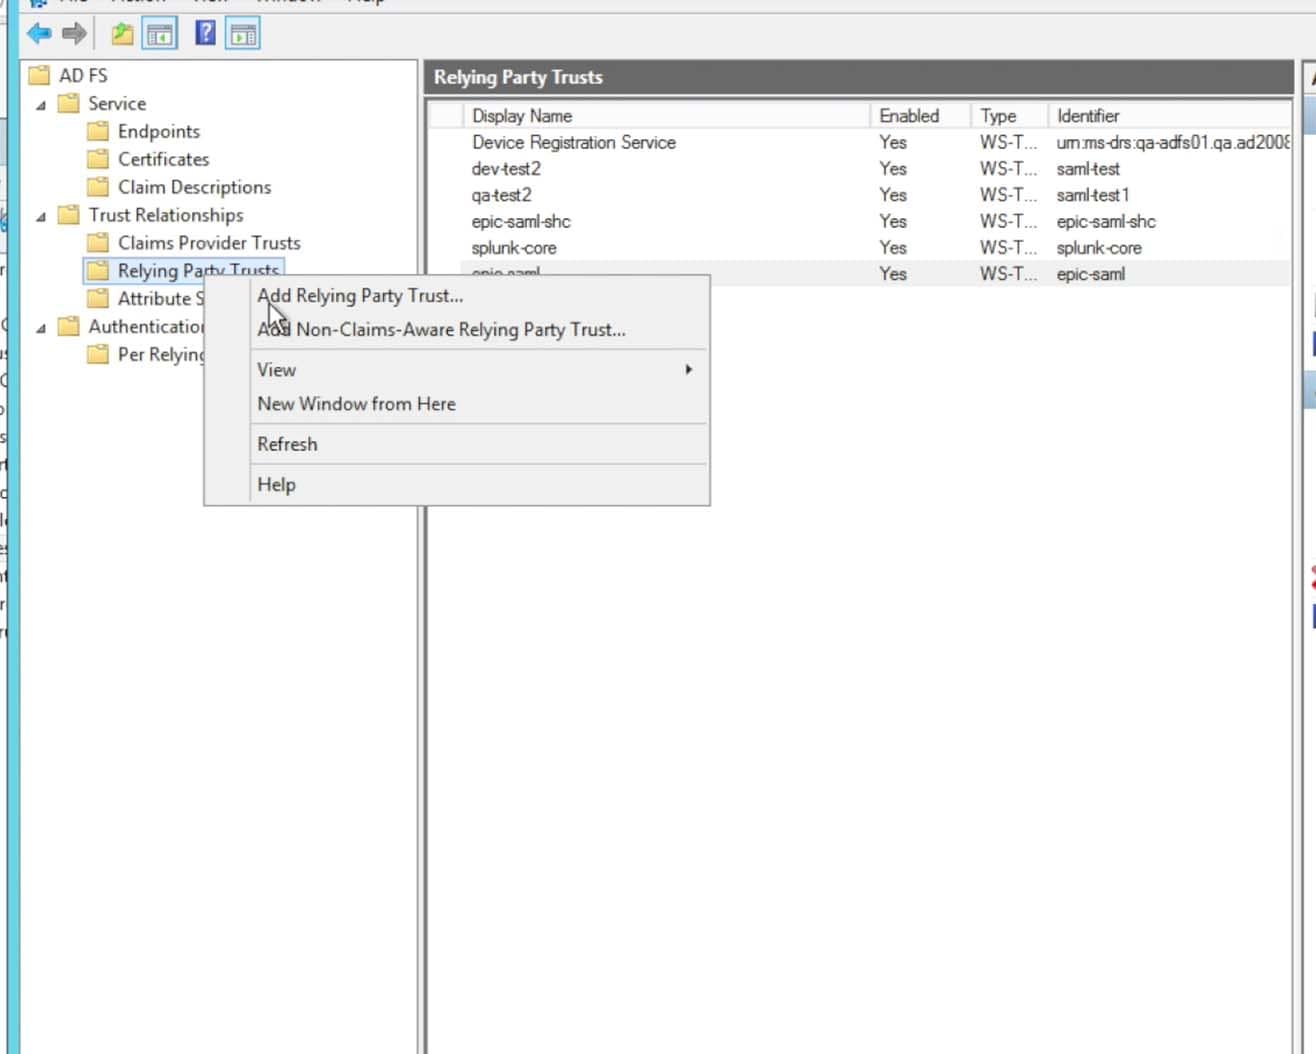
Within ADFS, go to the ADFS->Trust Relationships->Relying Party Trusts option and choose to “Add a Relying Party Trust….
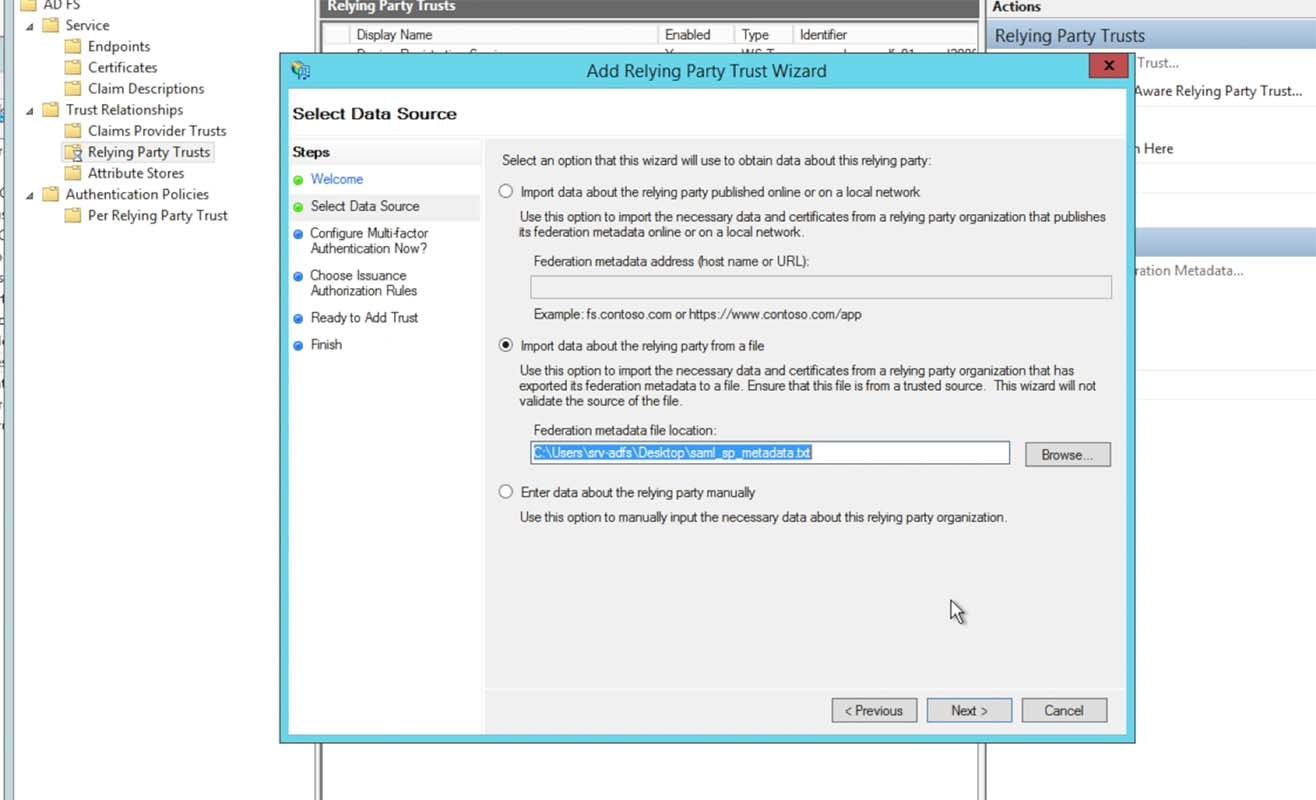
Choose to import data from a file, choosing the XML metadata file that you created from the Splunk> Cloud Instance’s spmetadata URL:
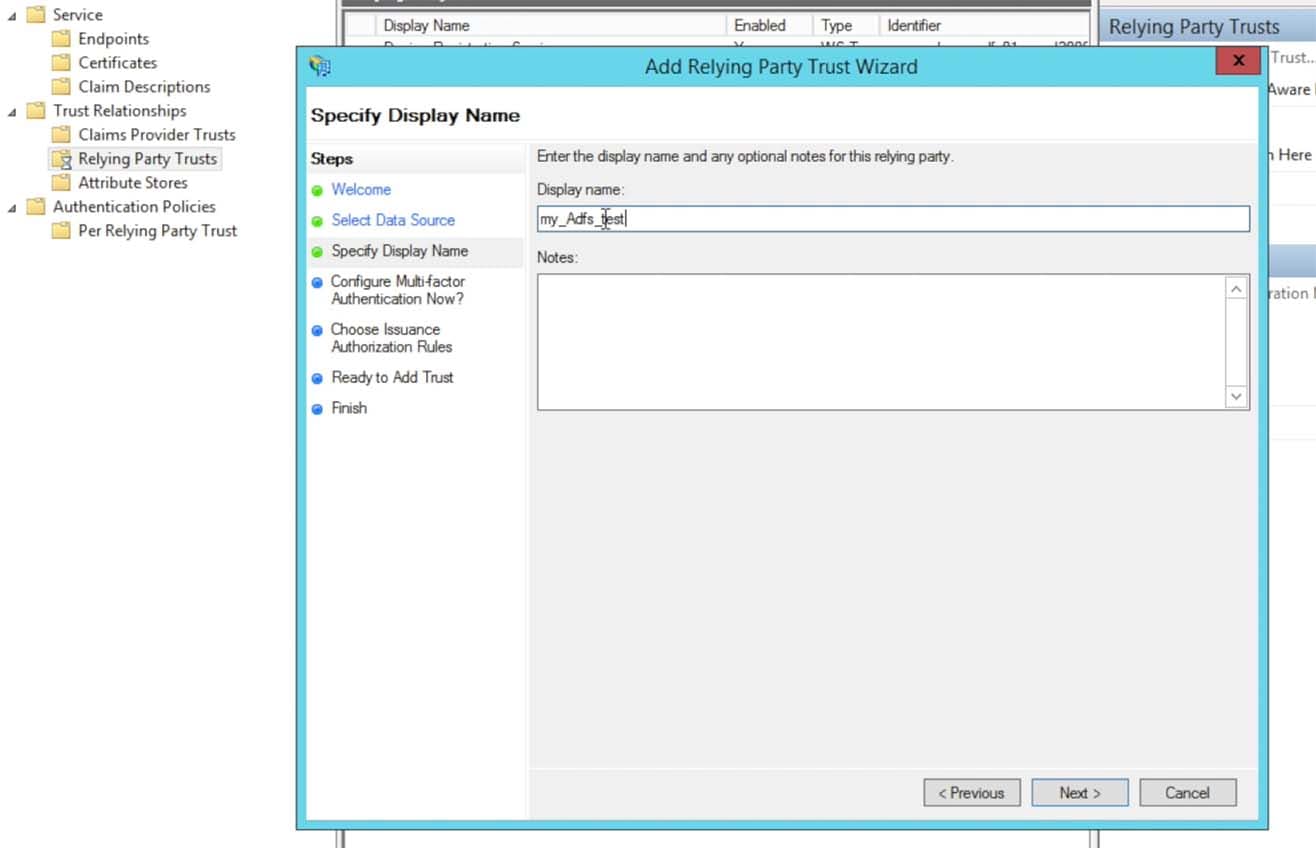
After the import screen the next panel will open, enter in a Display Name that makes sense for you and per any naming conventions for the Relying Trust:
Choose the radio button “do not configure multi-factor authentication settings” and click Next
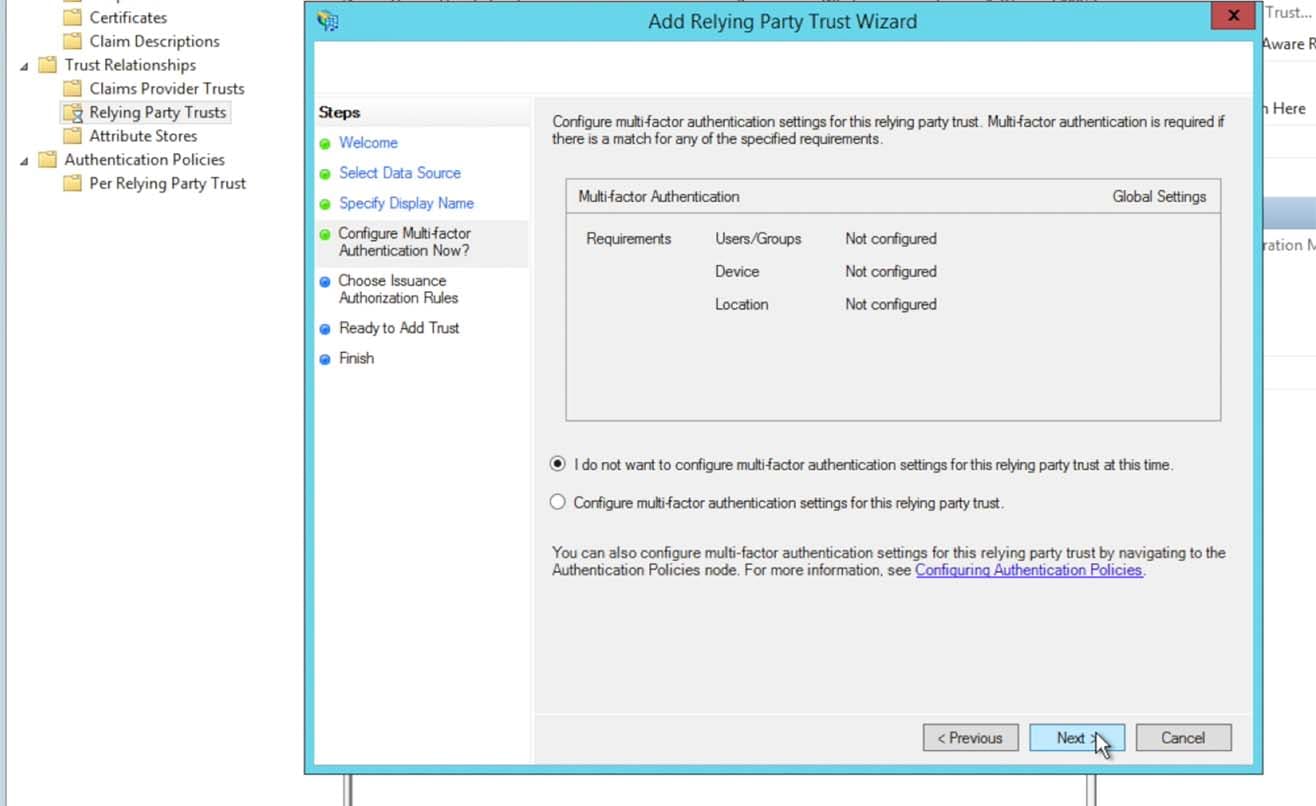
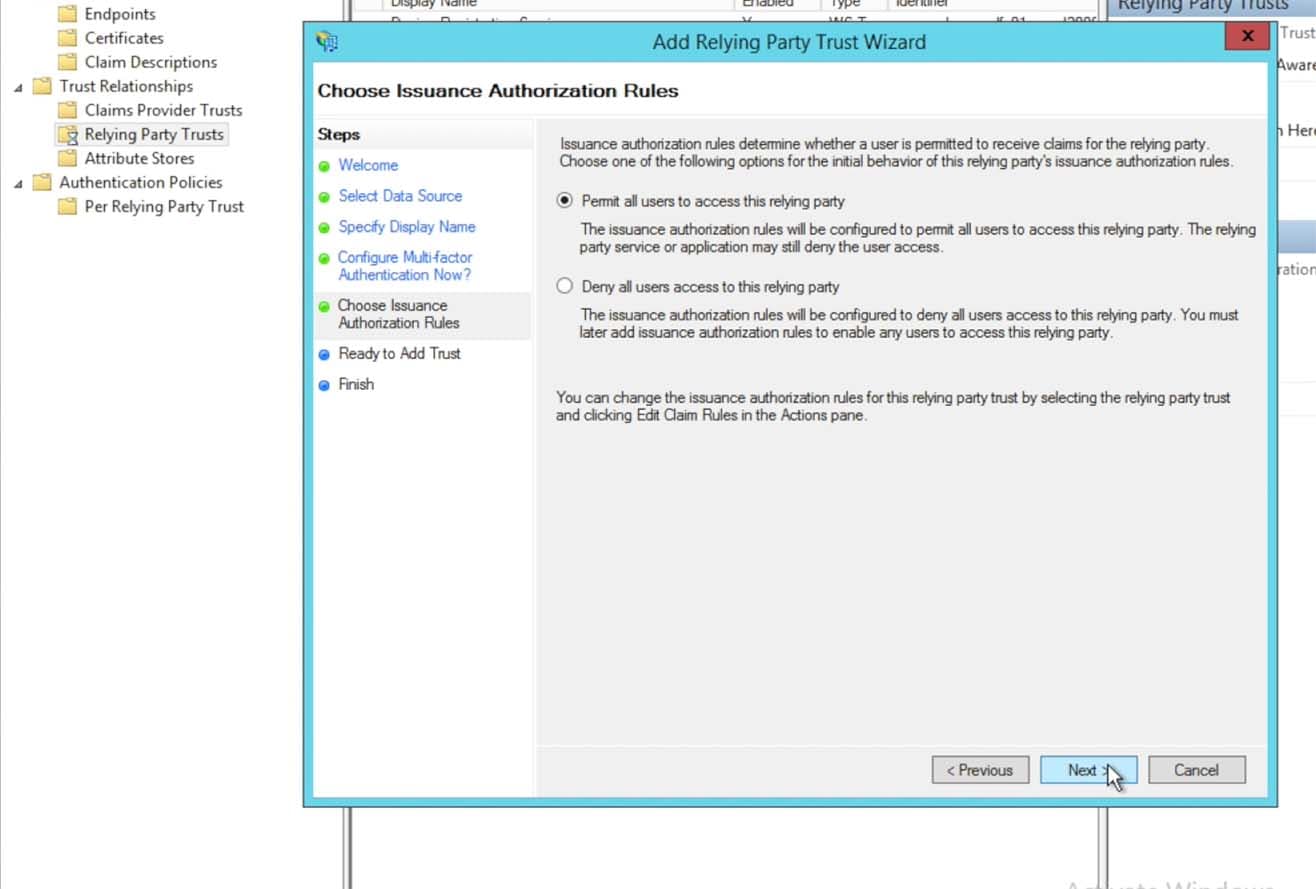
Click through the next couple of panels in the Wizard, leaving the defaults as they are presented:
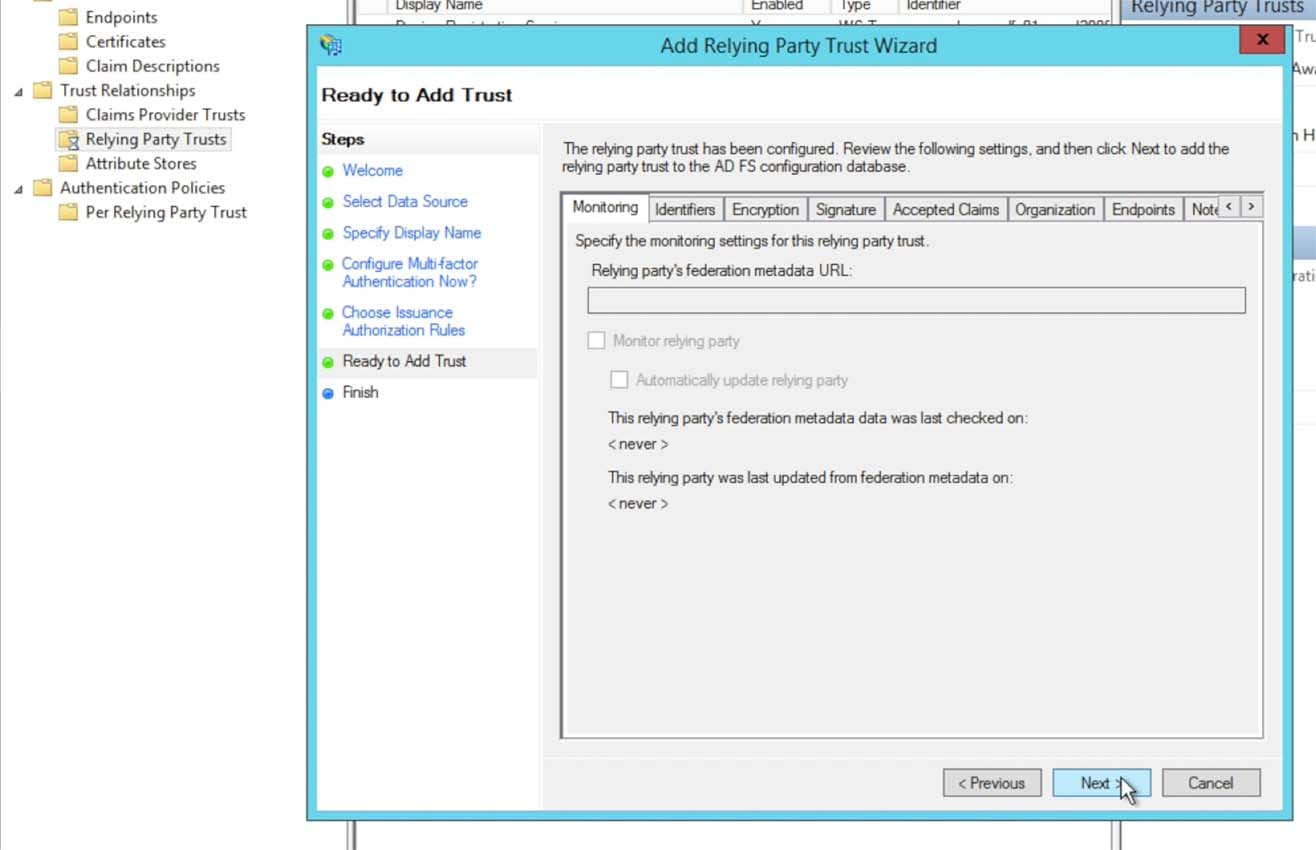
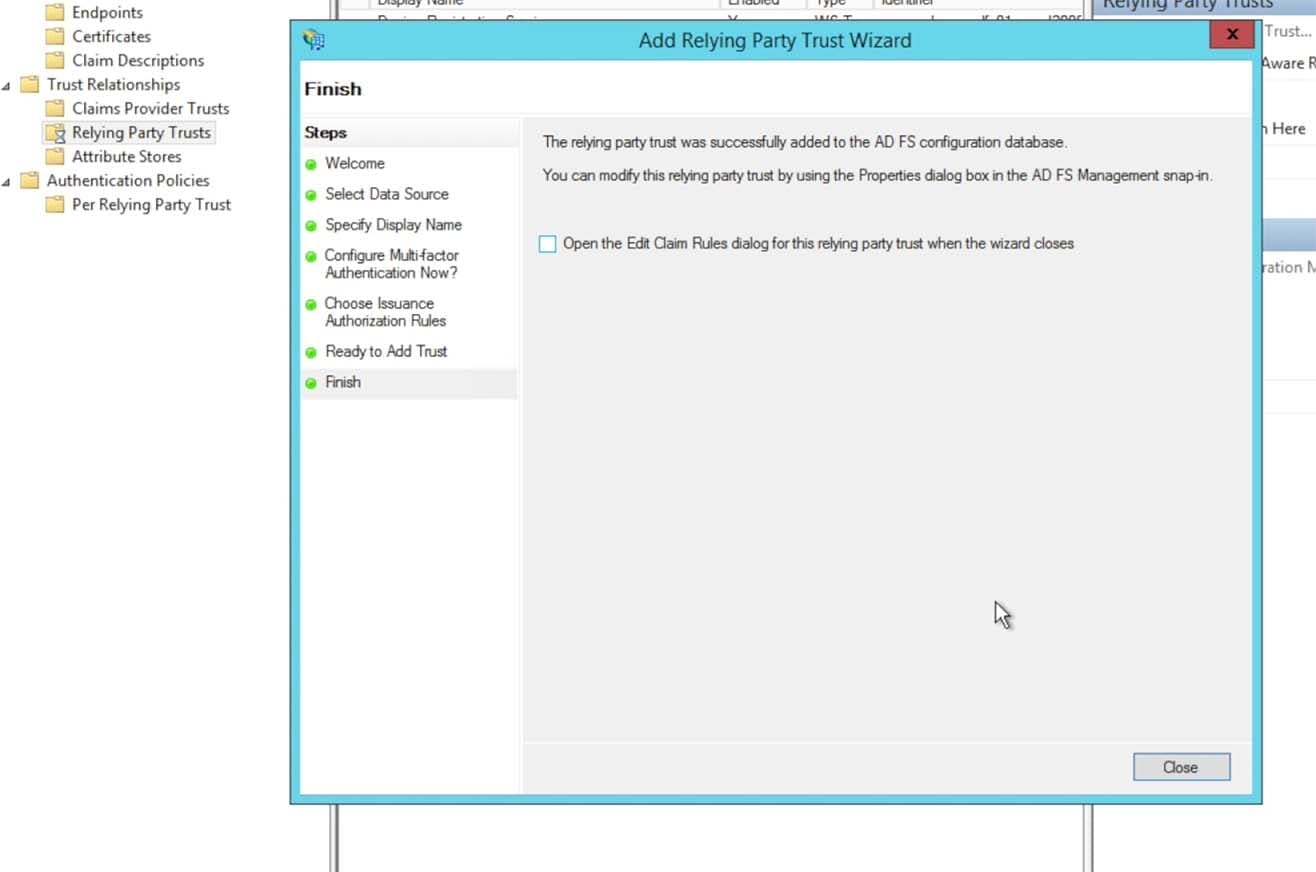
Un-click the Edit Claim Rules dialog and click Close to exit the Trust Wizard
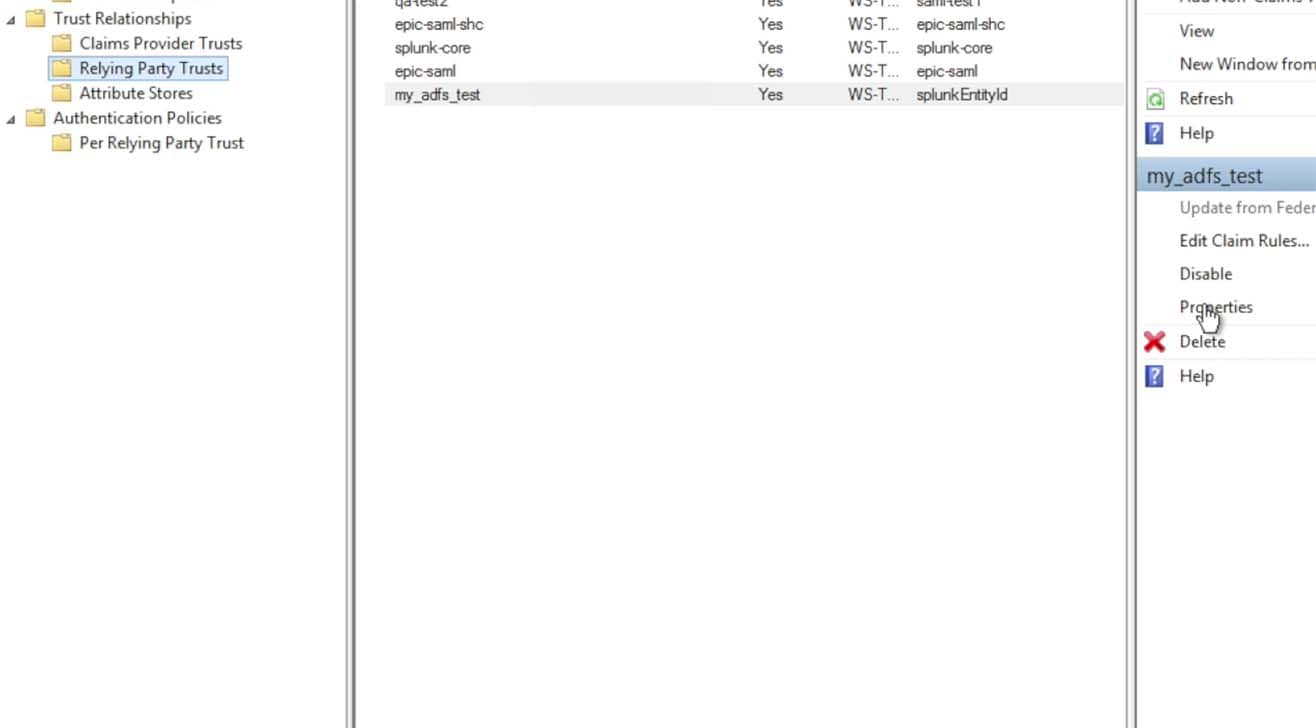
Go back into the Properties for the Relying Party Trust that you just saved as there are a couple of changes that need to be made:
Click into the Identifiers tab. The default Relying party identifier for Splunk came in from the metadata file as ‘splunkEntityId’. Click to remove that default string and add a string that makes sense to you and adheres to your naming scheme. A typical string that is used is “splunk-” followed by the Splunk Cloud instance name, such as “splunk-acmecorp“:
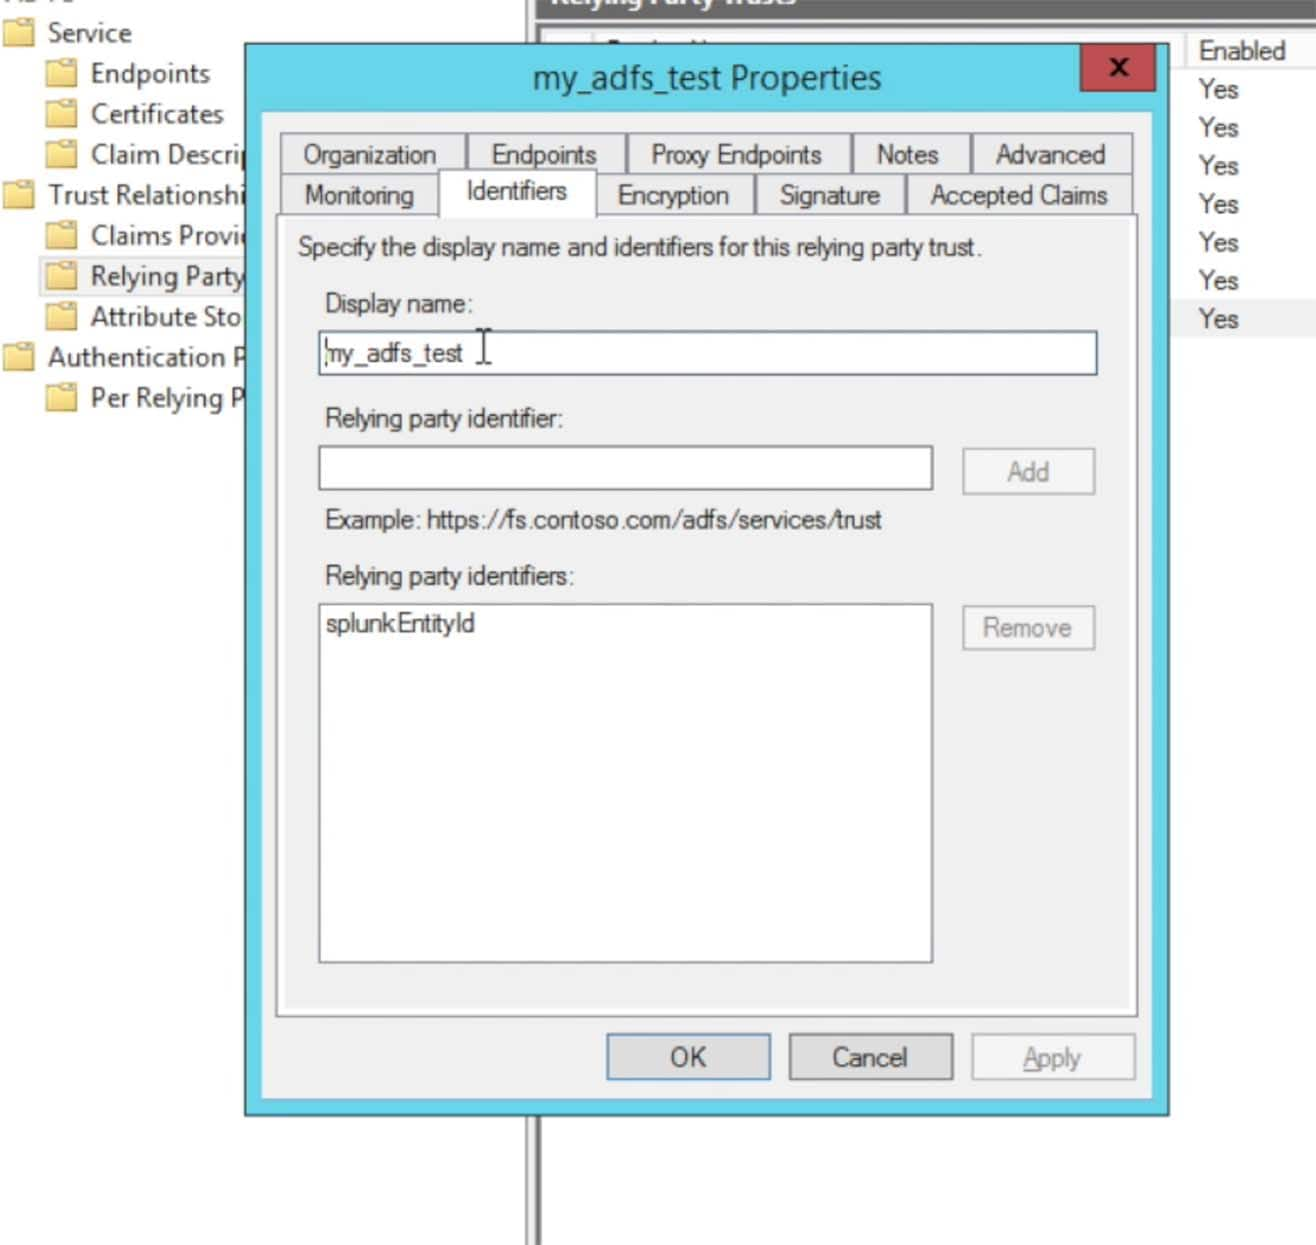
After you have entered a Relying party identifier choose the Encryption tab:
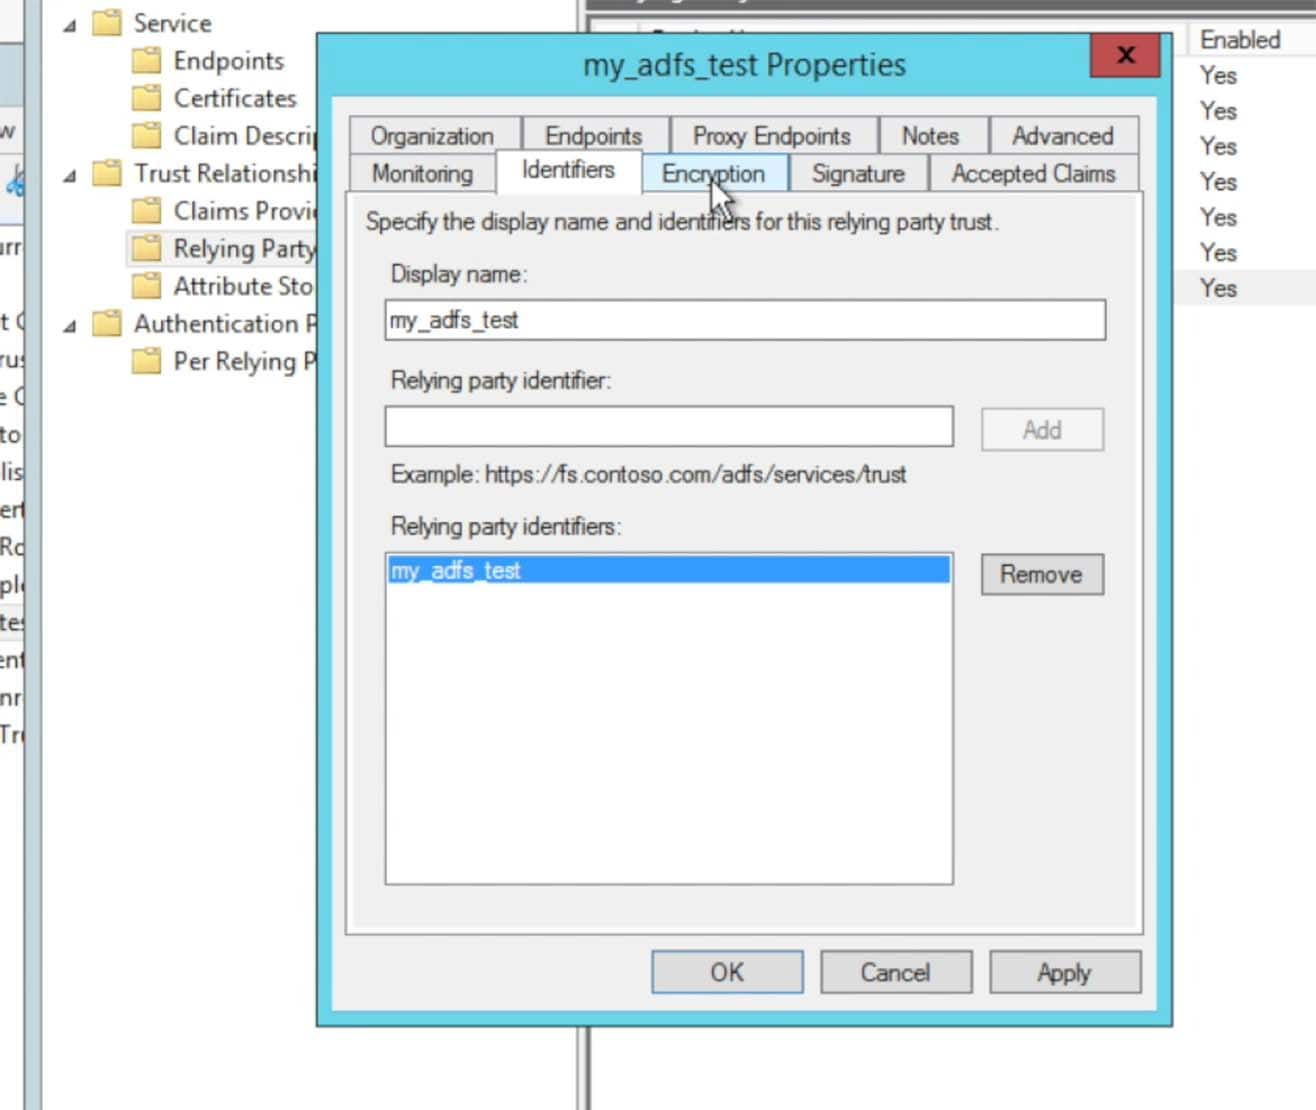
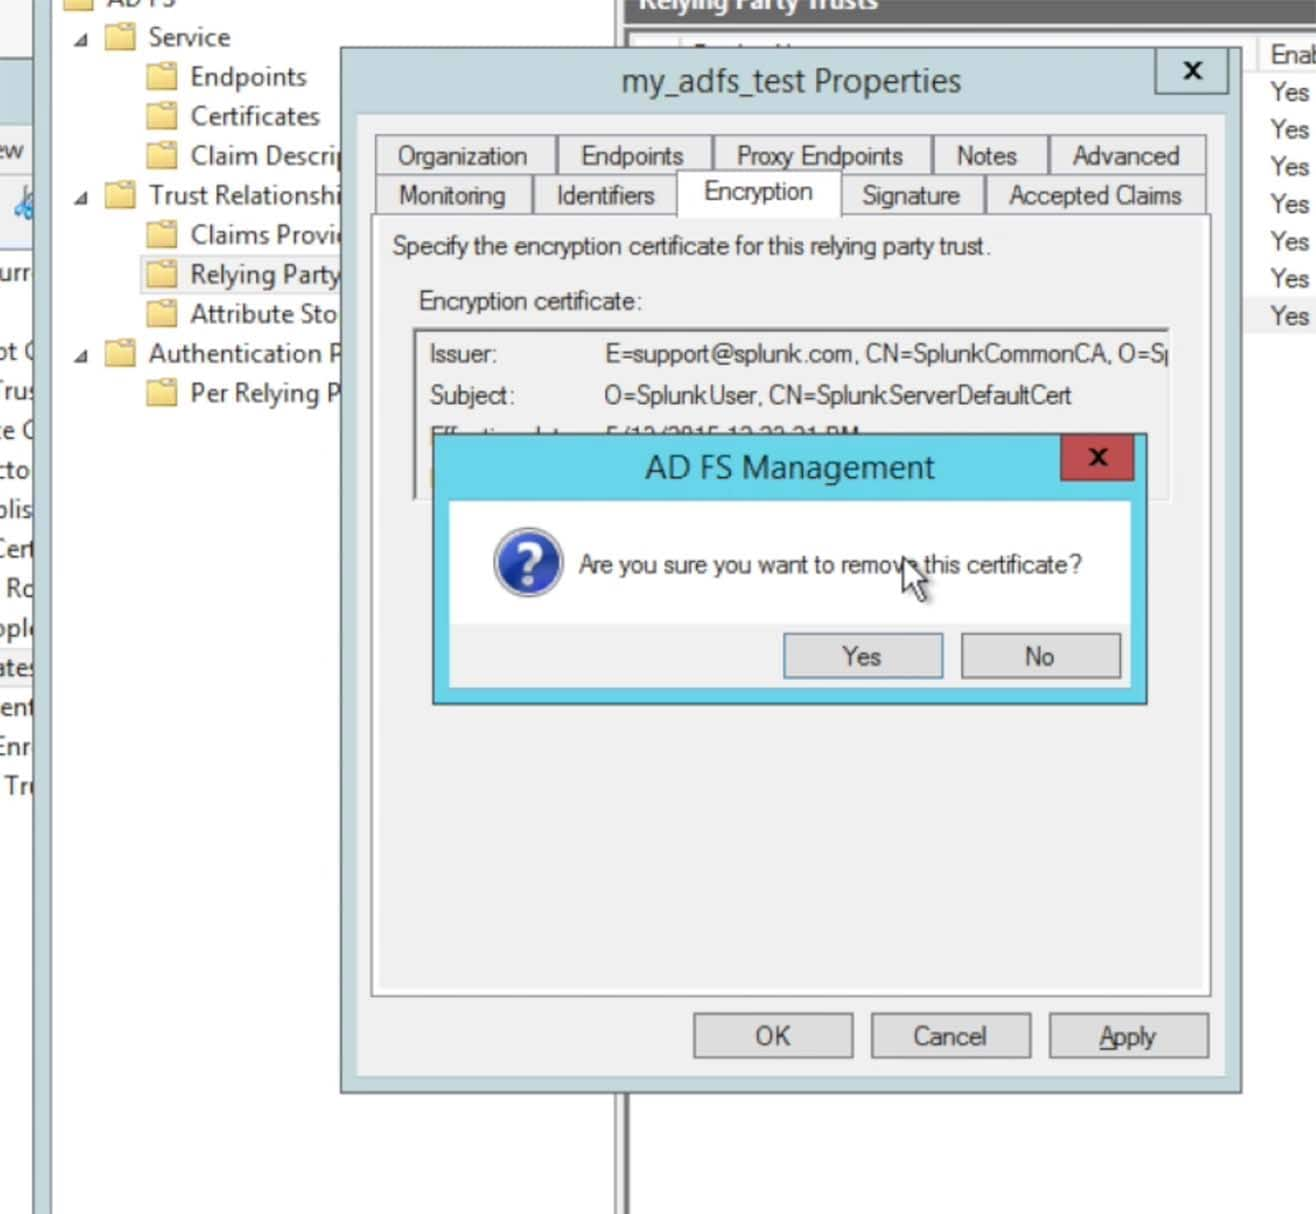
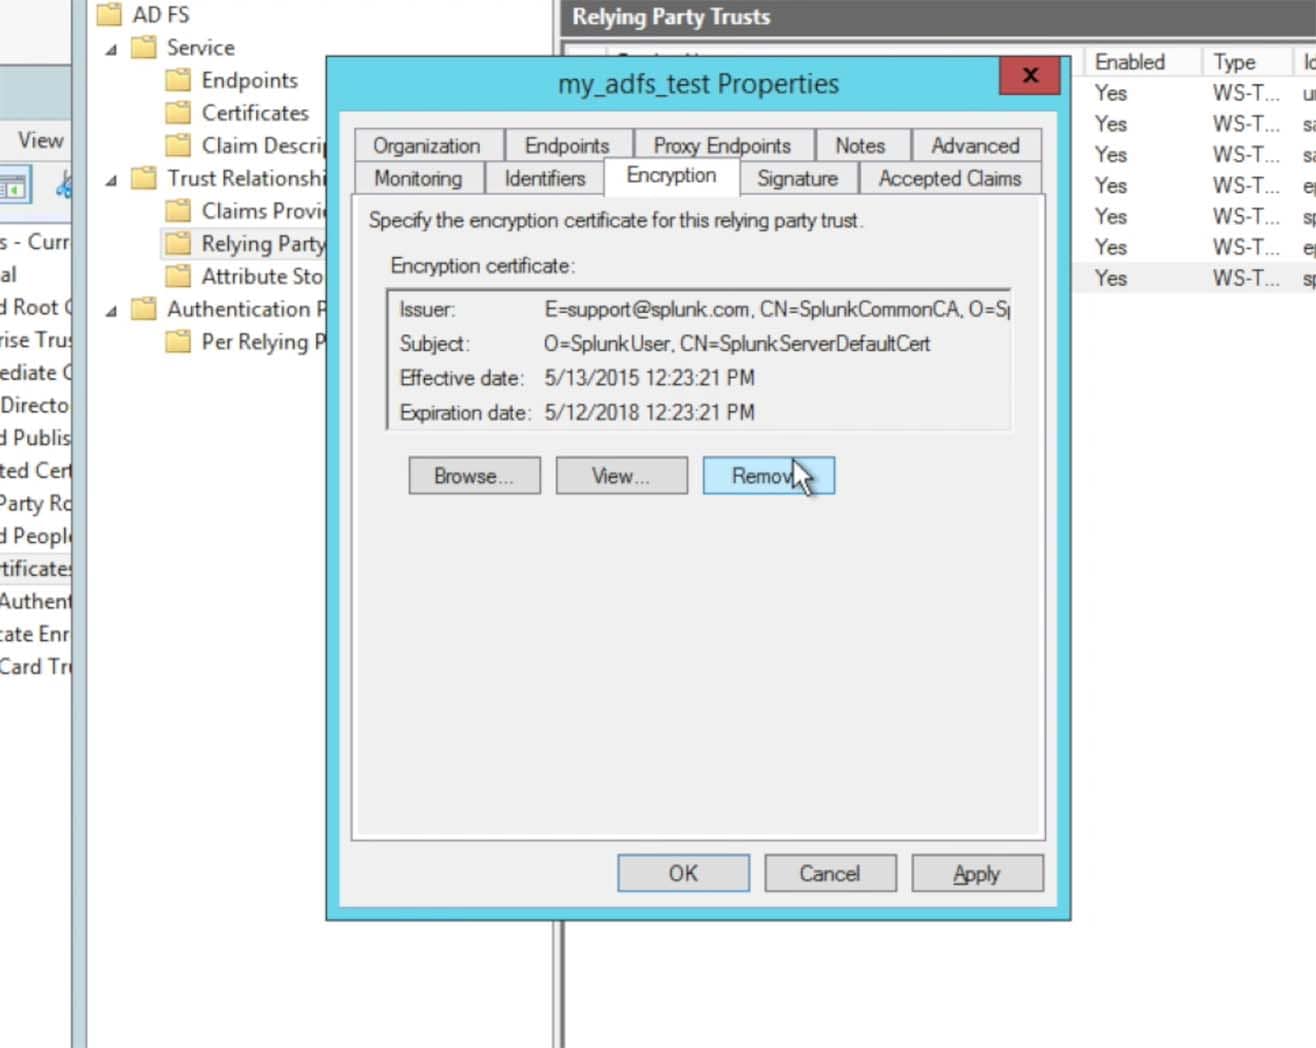
At this time, Splunk> Cloud 6.4.x does not support encryption. However, with Splunk> Cloud, everything is encrypted through https (SSL). Choose to remove the encryption certificate:
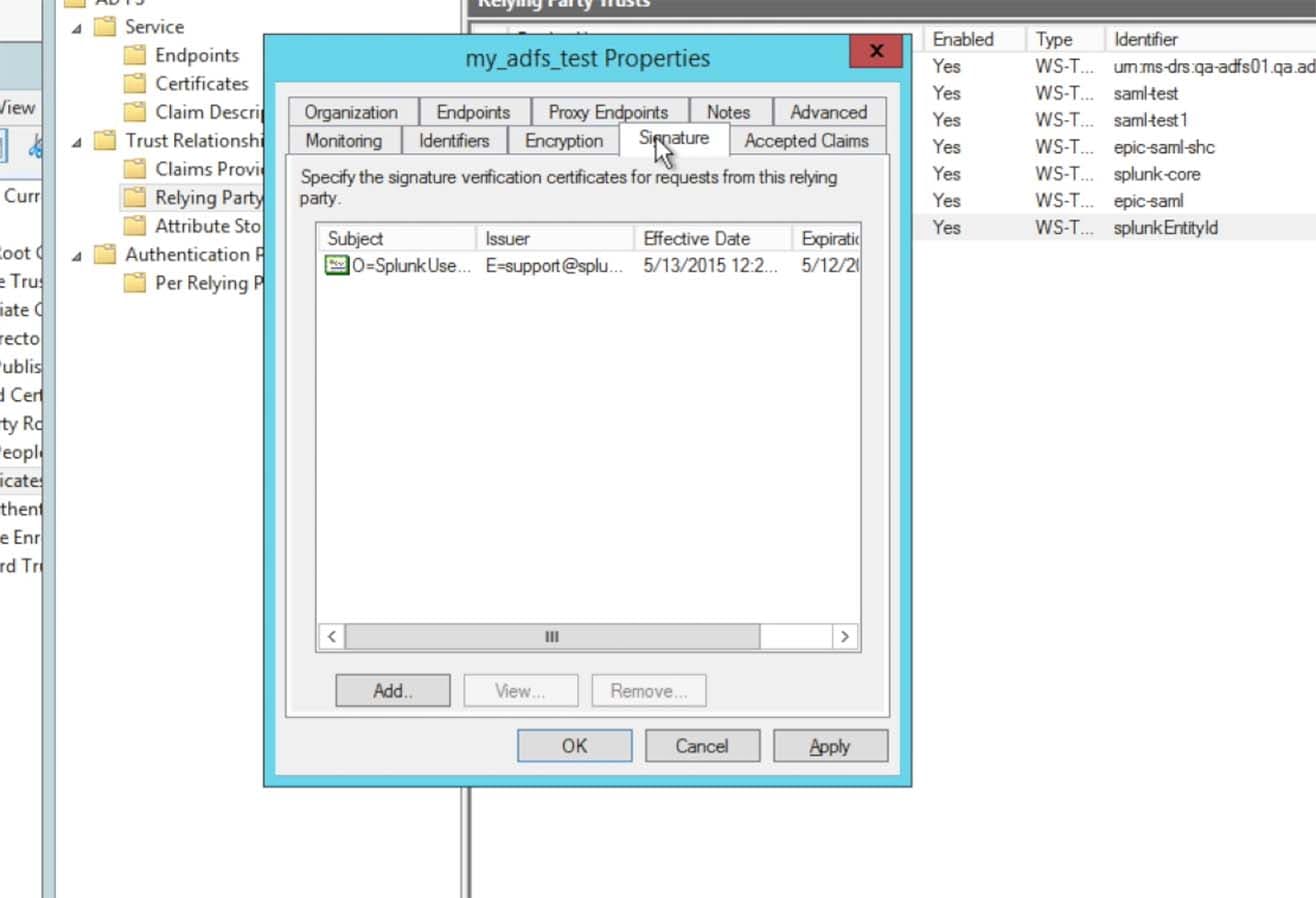
Choose the Signature tab and make sure the Splunk Certificate was imported:
Click on the Advanced tab, the self signing certificate for Splunk Cloud instances are from a SHA-1 hash algorithm. Choose the Secure hash algorithm to be set as SHA-1.
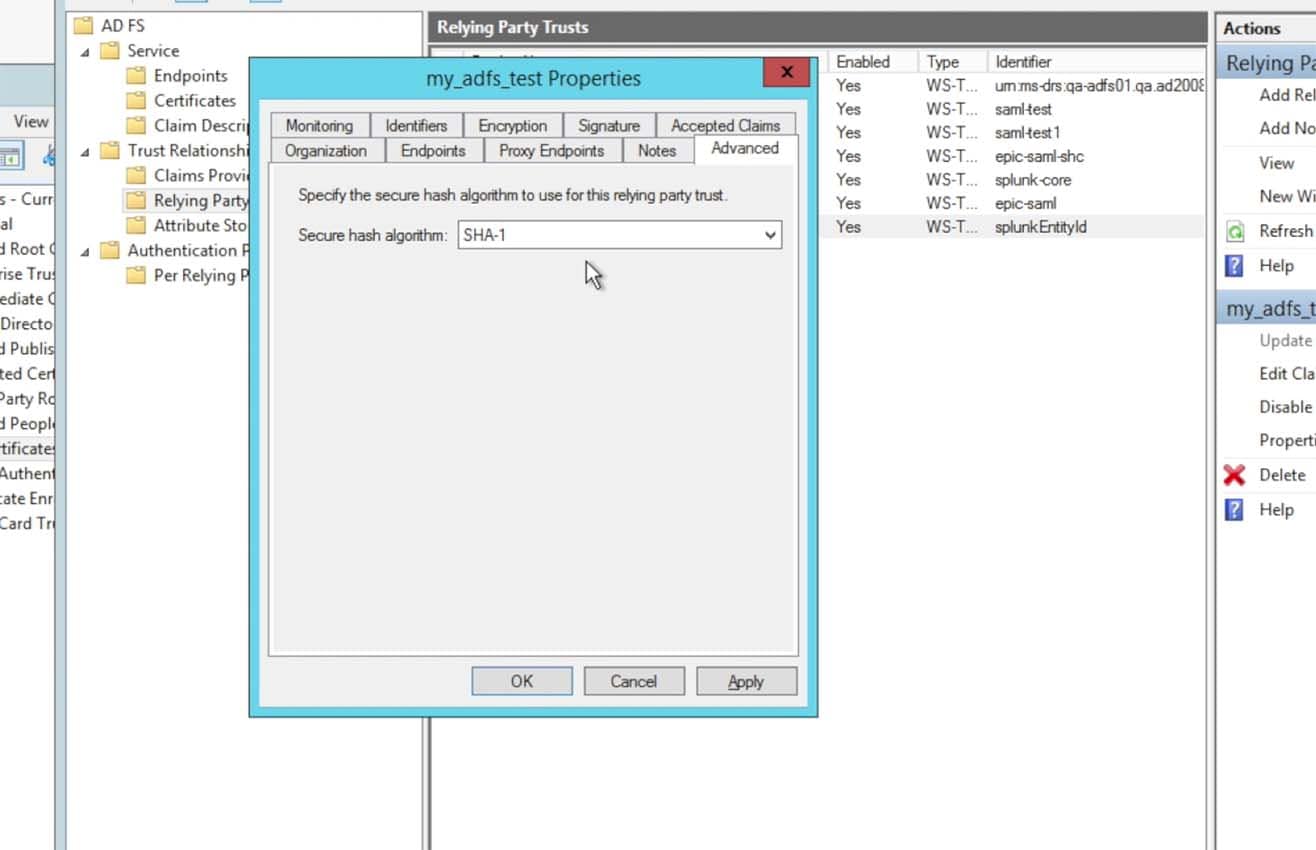
I know what you’re thinking… “SHA-1?! That’s so 2005!” – We know it, so the next release will support SHA-256. But for 6.4.x, it’s SHA-1 or nothing…
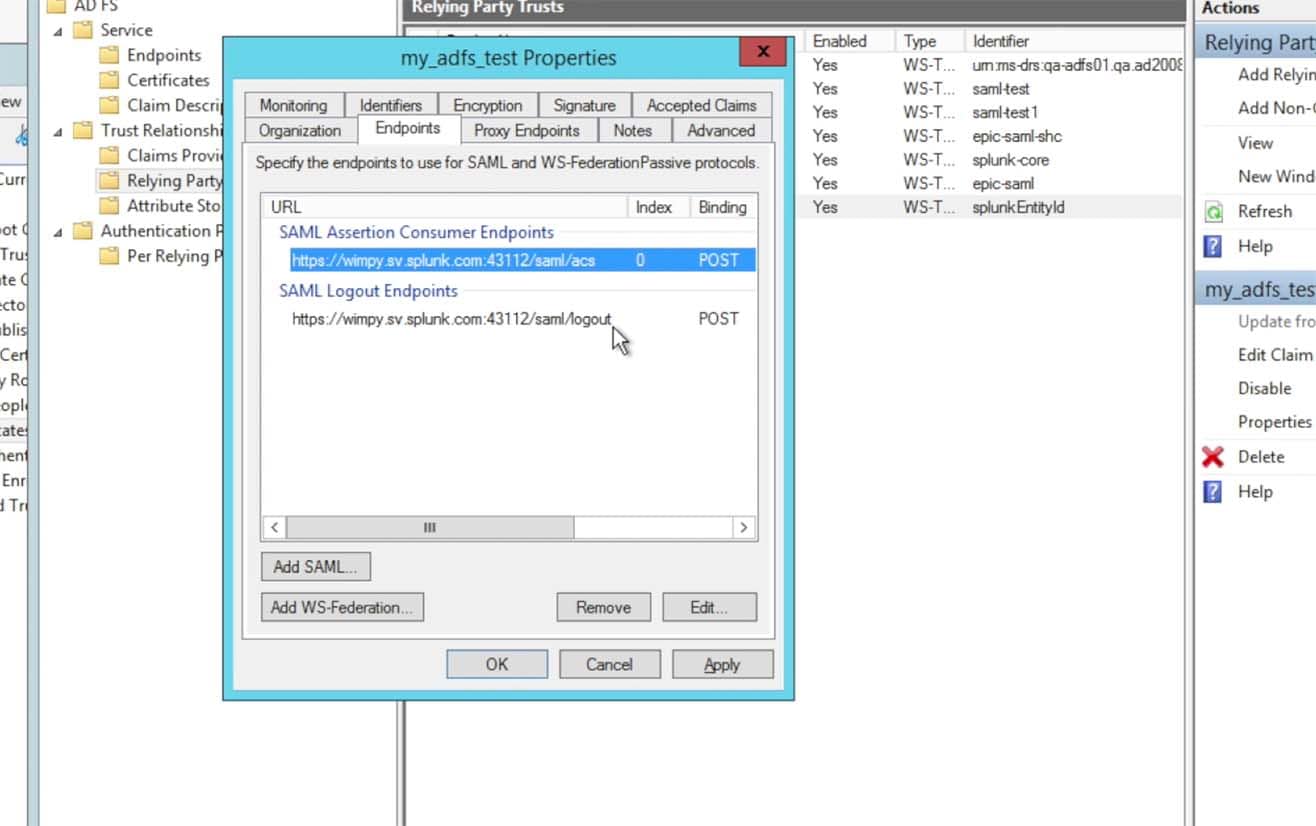
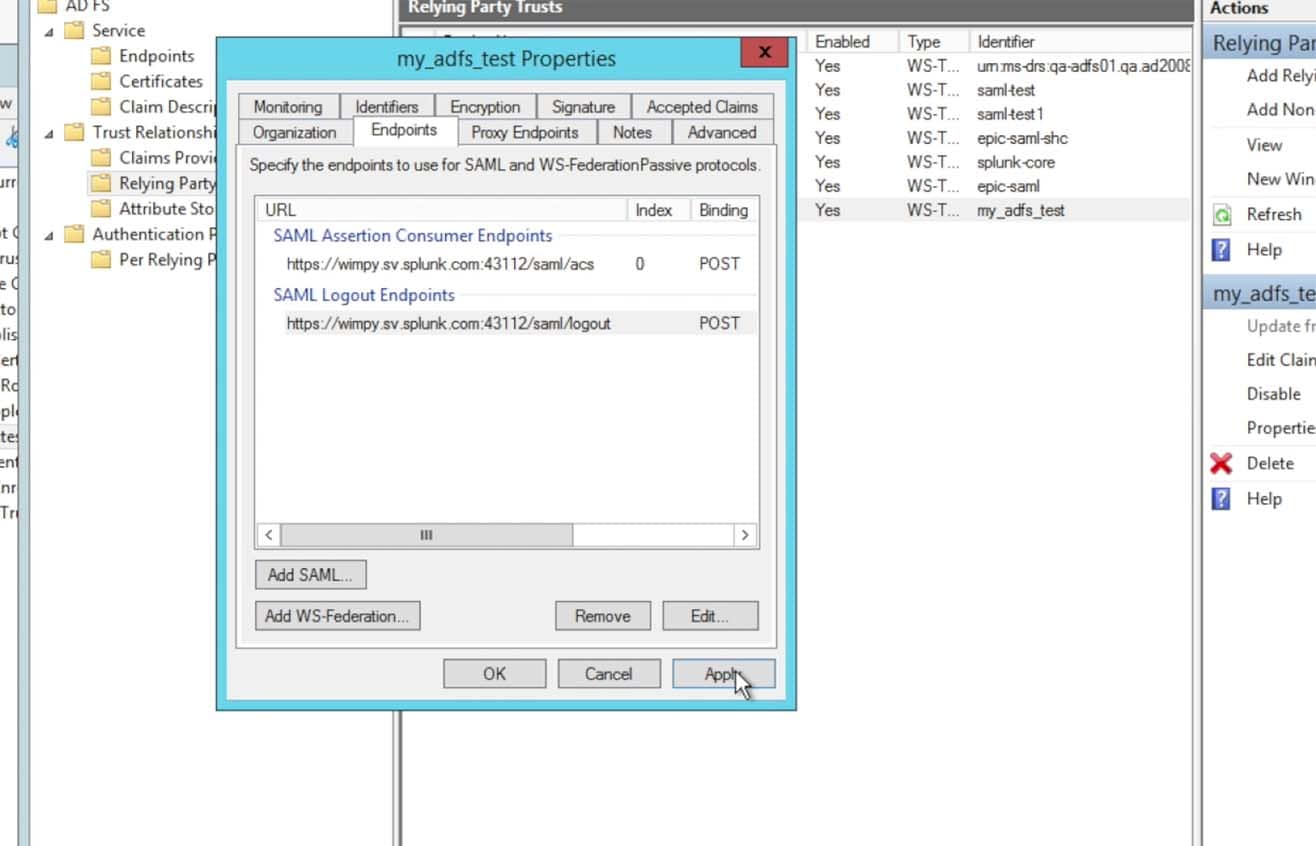
Click on the Endpoints tab and make sure the Consumer Endpoints is the URL for the Splunk> Cloud Instance by the URL https://<name>.splunkcloud.com/saml/acs (note that the screen shot below includes a port, this is from an internal Splunk test instance, your Splunk Cloud URL will not contain a port number quantifier – if the metadata provided a port within the endpoint URL, please do take it out)
As well, make sure the Logout Endpoints is also specific to your Splunk Cloud instance by the URL https://<name>.splunkcloud.com/saml/logout:Also, the metadata from the Splunk Cloud search heads will most likely have the search head’s hostname canonical name in the URL. In Splunk> Cloud we use ‘sh1.<customer>.splunkcloud.com’, ‘sh2.<customer>.splunkcloud.com‘, etc. for the search head OS DNS (A Record) name. Then we create a DNS Alias record (C-Name) for the search head such as ‘<customer>.splunkcloud.com‘ for a general search head, ‘es-<customer>.splunkcloud.com‘ for an ES search head, etc. The search head’s certificate, however, is tied to the C-Name record and not the A record. Thus, if your URL comes across in the metadata as ‘https://sh1.acme.splunkcloud.com:8080/saml/acs‘ – please do remove both the ‘sh1.’ and the port ‘:8080‘ from the URL. It should ONLY reflect the C-Name (Alias) DNS name of the search head, such as ‘https://acme.splunkcloud.com/saml/logout‘.
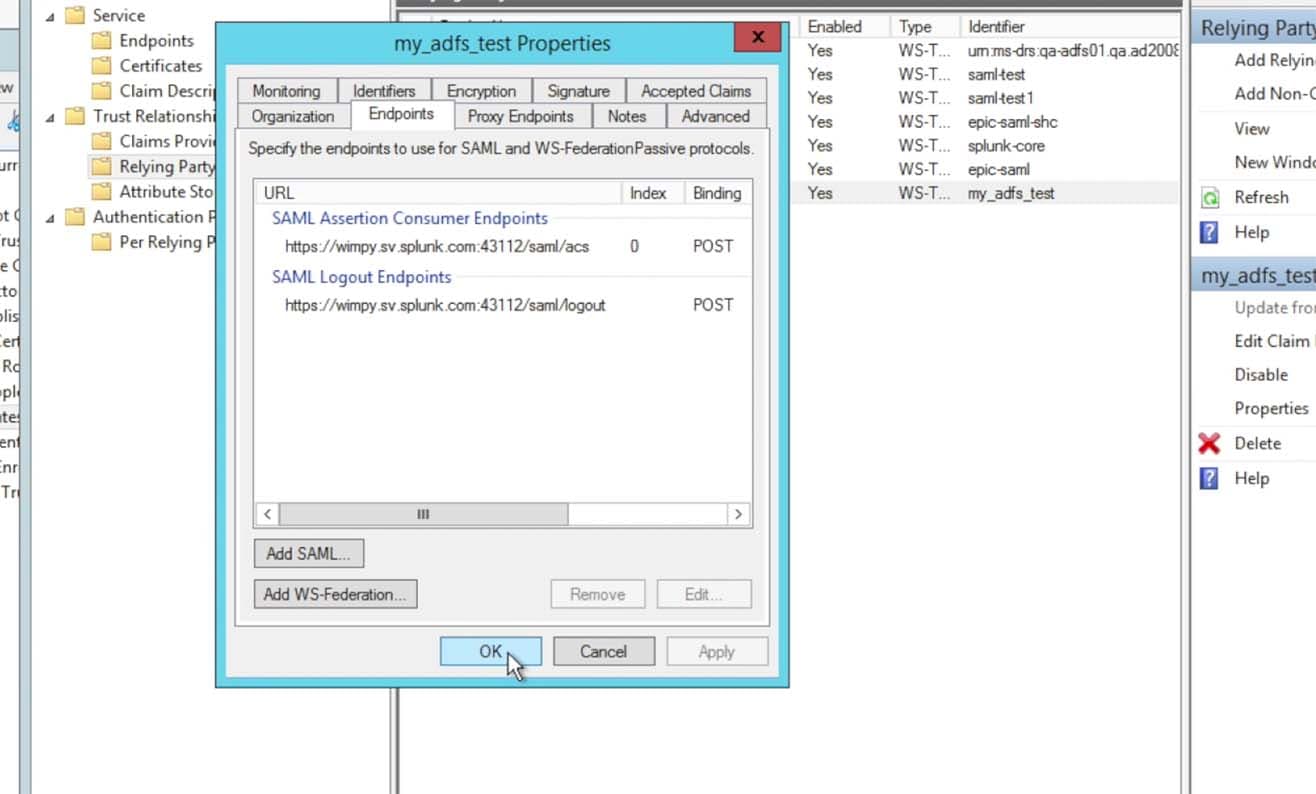
Finish the properties modifications by clicking Apply then Ok:
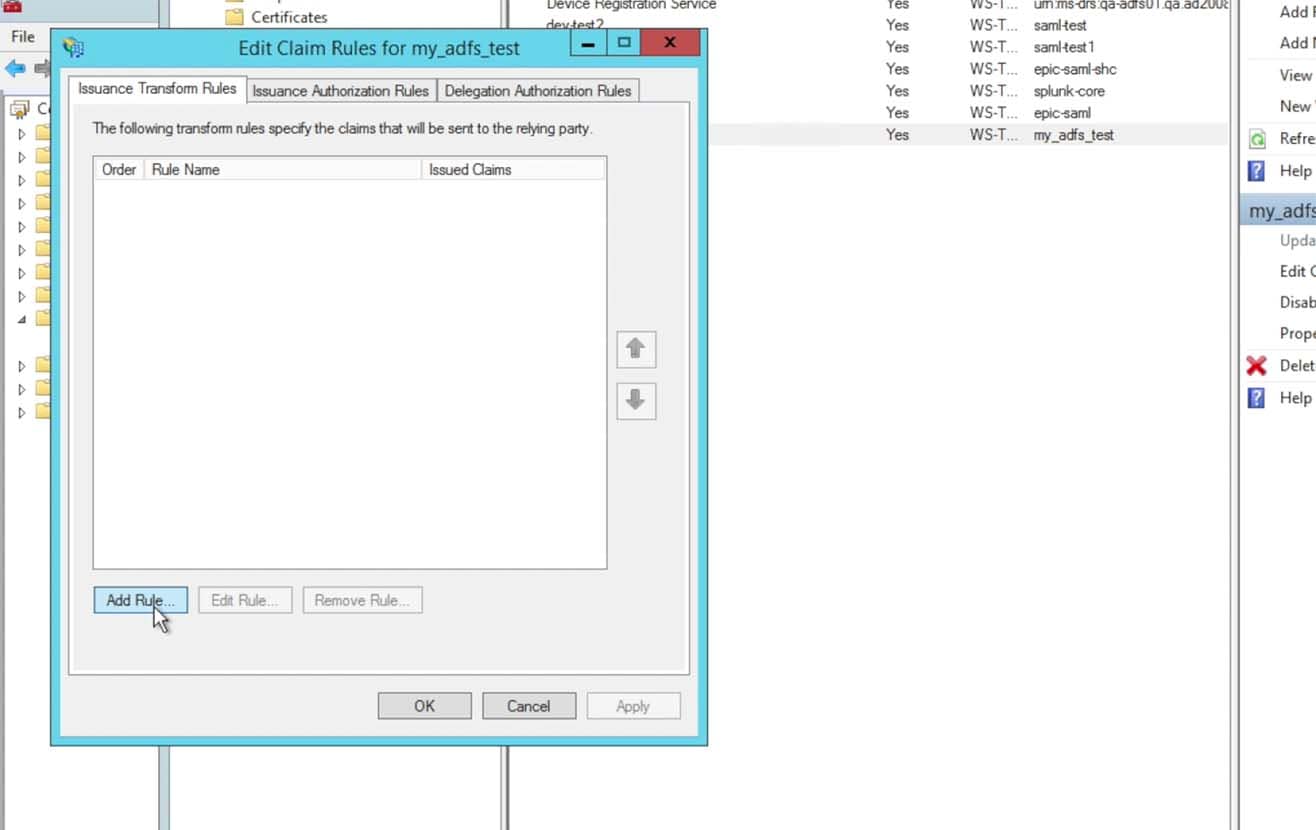
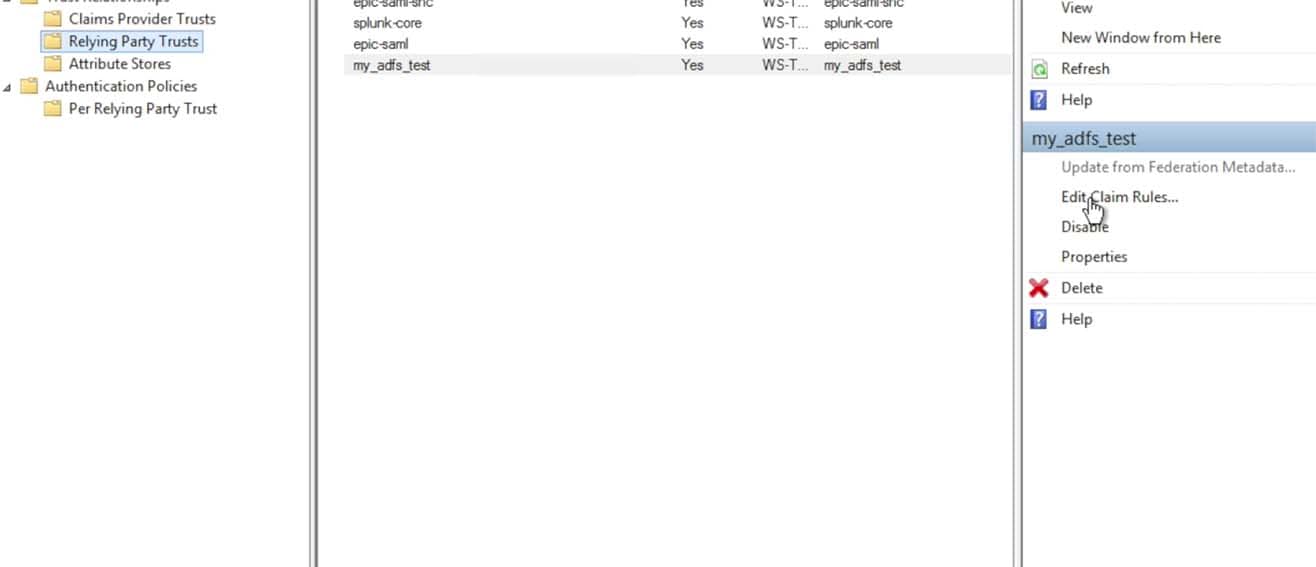
After finishing the Relying Party properties changes, choose the right panel option to Edit Claim Rules…:
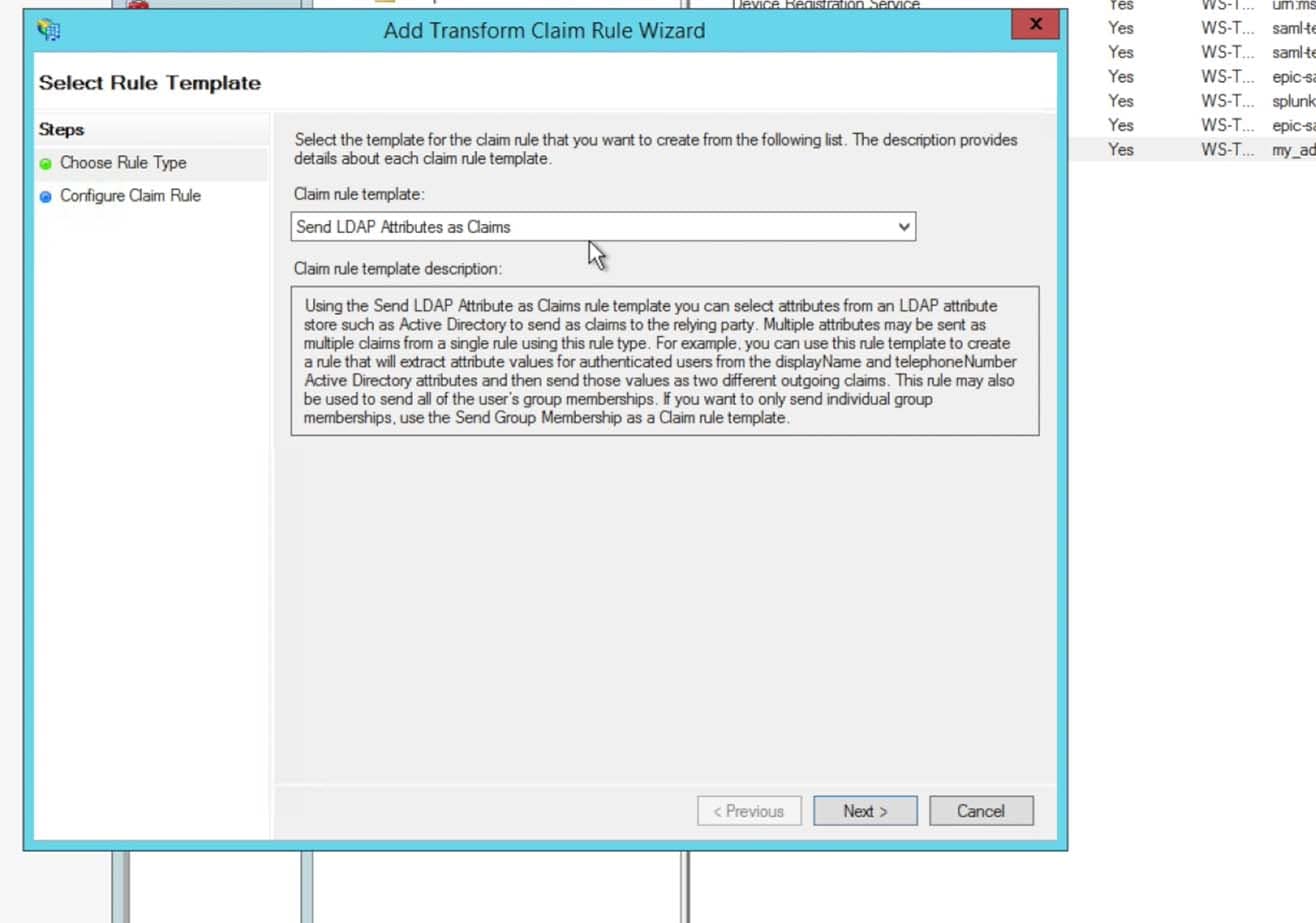
- Choose to Send LDAP Attributes as Claims and click Next:
- Enter in a name for the Claim rule name per your preferences and naming schemes. Choose the Attribute store to be Active Directory:
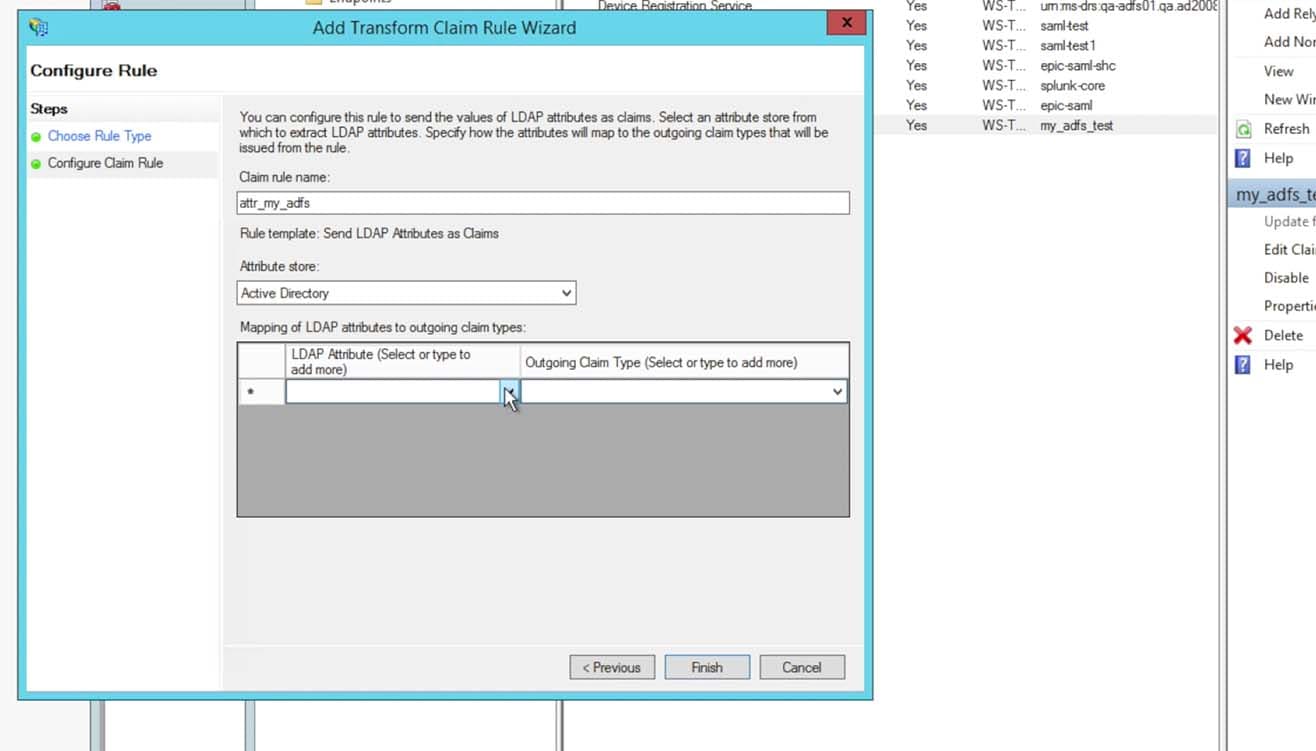
- For the first attribute, choose Display-Name and enter in the Outgoing Claim Type as the string “realName” without the quotes. The realName attribute will be the Splunk account’s Full Name and is displayed in many locations within the Splunk UI. This can be changed to your preference, however most commonly in ADFS it is the Display-Name.
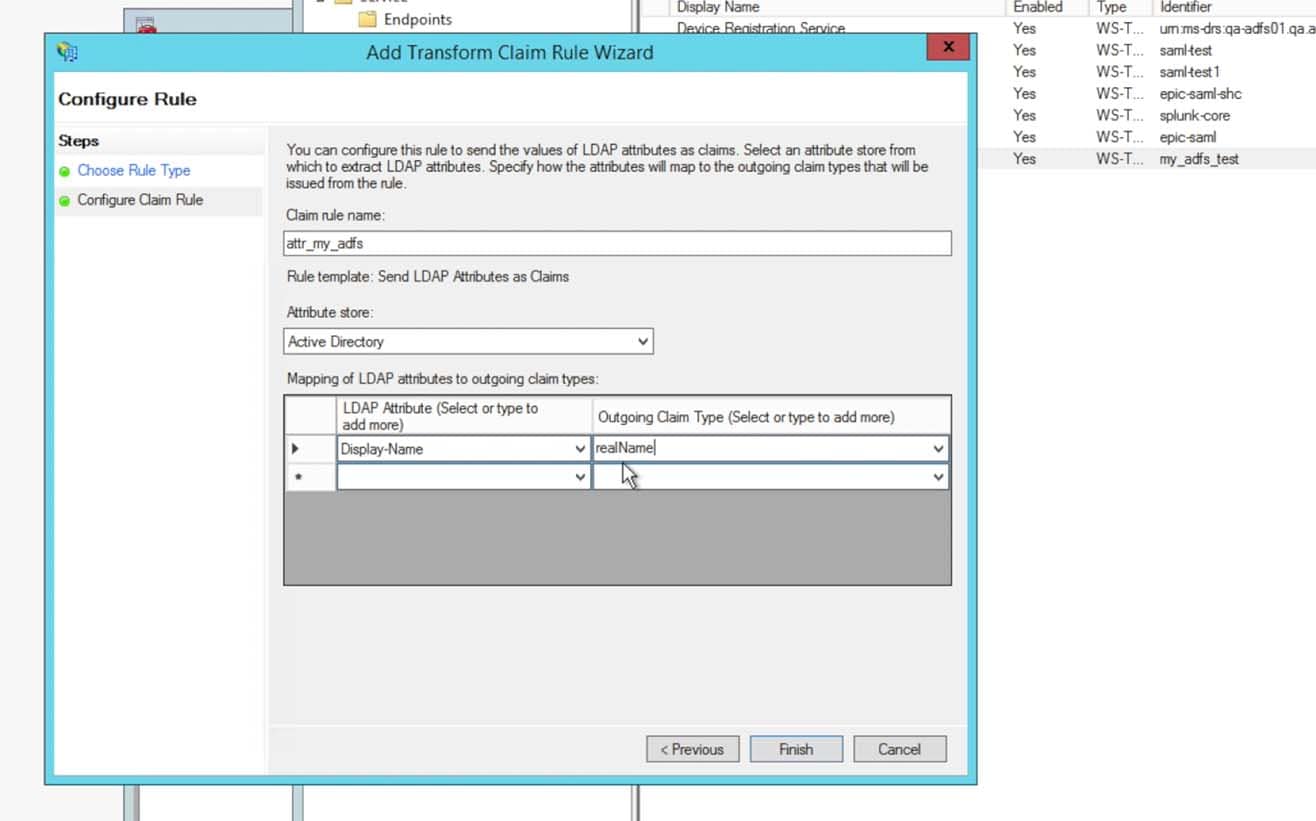
- For the second attribute, choose E-Mail-Addresses and in the Outgoing Claim Type enter the string “mail“. This is the e-mail address that will be passed into Splunk and used as the Splunk account’s E-mail address.
For the third attribute, choose Token-Groups – Unqualified Names and choose Role from the pulldown for the Outgoing Claim Type. This attribute will send over a list of groups the person is identified to. These groups will later be mapped into Splunk Roles to provide the appropriate permissions in Splunk that the users within the groups should acquire once authenticated.
 Here is where we need to discuss something a bit further. The ‘Token-Groups – Unqualified Names‘ attribute is a list of all AD groups that a user is assigned to. These groups are then used in a mapping mechanism (see later section of this posting for Splunk> configuration) to map the AD Group to a Splunk> Role or multiple roles.Most entities choose to create several groups for each set of users that will be access each instance of Splunk> Cloud search heads. For instance, for the ‘Acme‘ company, we might have a set of users that need Admin role privileges in the general search head. So we can create an AD group named ‘splunk-admins‘ as an example, then another as ‘splunk-users‘. If we have an Enterprise Security search head (and thus a second ADFS Relying Trust) we could create additional groups named ‘splunk-es-admins‘ and ‘splunk-es-users‘. After these AD groups are created, we can then assign users to each group – those that need general search head admin role, those that just need user role, those that need access to the ES search head for various Splunk> roles, etc. Then in the Splunk> SAML group->role mapping (again shown later in this posting) we will set up the group name to map to the appropriate Splunk> roles.
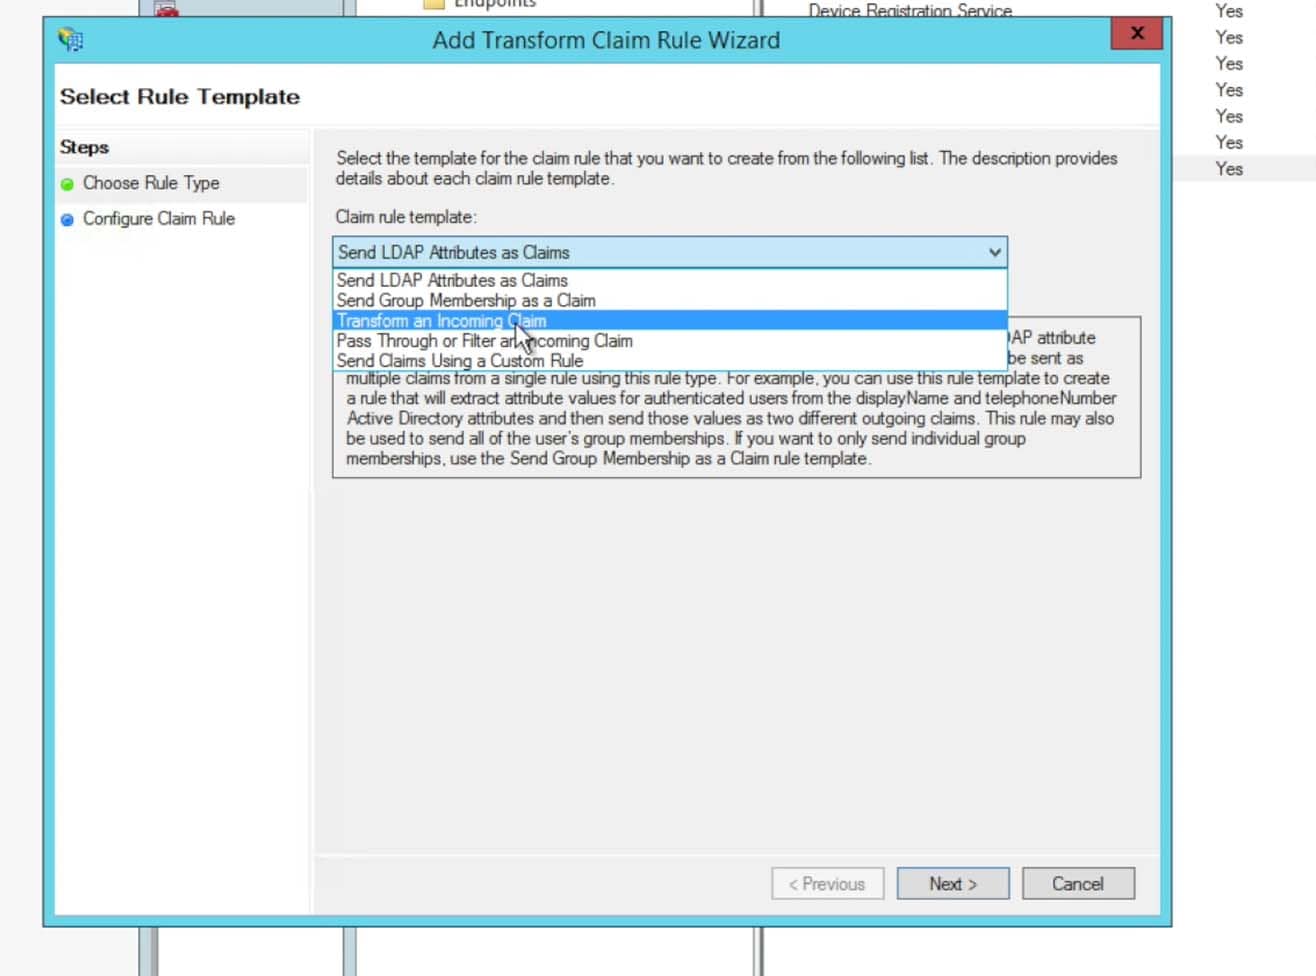
 - Click to Finish the claim rules. Then choose to add another new Claim Rule. For this new Claim Rule choose Transform an Incoming Claim and click Next
- Enter in a Claim Rule Name that adheres to your preferences and naming schemes. The Incoming claim type needs to be UPN:
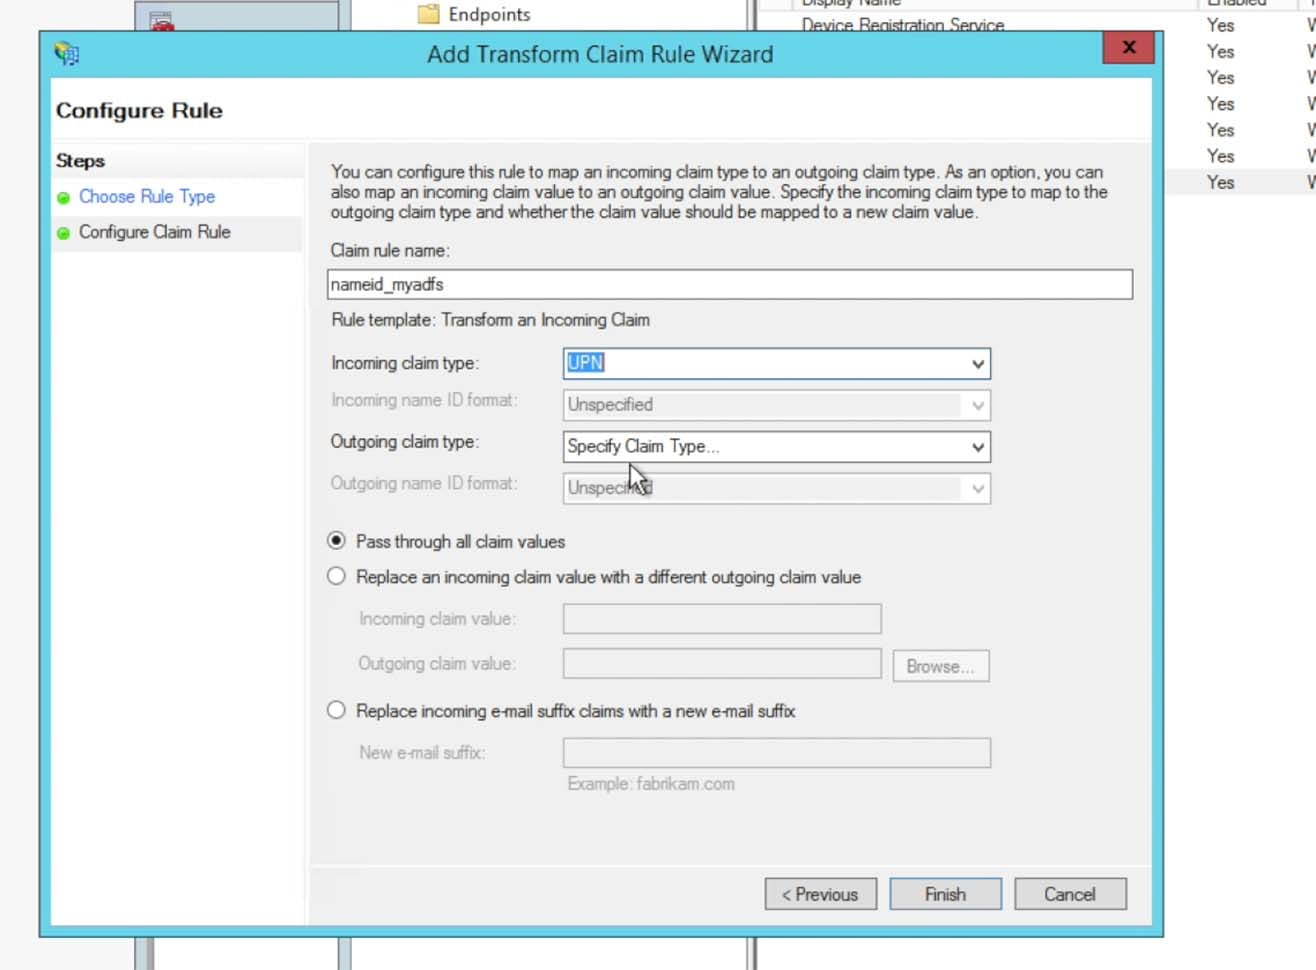
- Choose Transient Identifier for the Outgoing name ID format: This Claim Rule will pass the value required for the NameID attribute. This attribute will be used by Splunk for the user’s account name in the Splunk Cloud instance. Click Finish then Apply and Ok to finish saving all claim rule work.
 Now here’s another interesting point in the overall configuration…. Some organizations have set up their AD environment where the main UPN for the NameID comes across with a value that does not match what they wish for it to be in their Splunk> Account name. For example, if you have been using Splunk> Cloud for quite a bit of time now with locally defined user accounts, you may have been using SAM account names for the name of the locally defined accounts. If the NameID attribute in the SAML Assertion contains something other than the SAM account name, then your users will come across into Splunk> as a net new user (as the NameID does not match the name of any existing accounts). Or, maybe the UPN comes across with the domain pre-fixed to the name you wish to use – such as ‘SPLUNK\MYNAME’. We cannot use a name with a ‘\’ character within it, and as well you’d like to see just ‘MYNAME’ and not ‘SPLUNK\MYNAME’. This is where things can get tricky, but there are ways around it. You will need to work with Splunk> Ops on ways to get a custom transformation claim rule written for your environment.For example, let’s say you are having the situation where the NameID is coming across as ‘SPLUNK\MYNAME’. Instead of creating a Transform Claim Rule as stated above, instead create a ‘Custom Claim Rule’. Within the ‘Custom Claim Rule’ you can specify a specific rule that will use the ‘regexreplace’ function to strip out the domain ‘SPLUNK\’ and replace it with just the remaining ‘MYNAME’ – but pass it along in the Assertion as the appropriate Transient claim type. An example customer claim rule is listed below.
c:[Type == “http://schemas.microsoft.com/ws/2008/06/identity/claims/windowsaccountname”] => issue(Type = “http://schemas.xmlsoap.org/ws/2005/05/identity/claims/nameidentifier”, Issuer = c.Issuer, OriginalIssuer = c.OriginalIssuer, Value = regexreplace(c.Value,”(?<domain>[^\\]+)\\(?<user>.+)”,”${user}”), ValueType = c.ValueType, Properties[“http://schemas.xmlsoap.org/ws/2005/05/identity/claimproperties/format”] = “urn:oasis:names:tc:SAML:2.0:nameid-format:transient”);Of course, if you are a much more experience ADFS admin, you can go it alone, maybe leverage your GTS skillz (Google That Stuff) to create your own custom claim rule. But Splunk> Support/Ops/Engineering is at your disposal to help assist you with that effort if it is needed.NOTE: With Custom Claim Rules we have experienced issues with the Single Log Out (SLO) portion of the SAML integration with Splunk> Cloud. There are situations where the NameID that is transformed into Splunk>, as it now differs from the UPN, will not match the ‘session’ within ADFS for the user. So when Splunk> sends a Logout message back to ADFS, ADFS looks for a user that is logged in by the transformed NameID, can’t find it (as within ADFS it is identified by the original UPN value) and sends a message back to Splunk> basically saying “Dude, there’s no-one here logged in by that name!” and we end up with an error. Some customers have disabled SLO, others have worked with Splunk> and Microsoft to create custom claim rules to resolve the issue so that SSO and SLO all works the way they wish it to. Bottom line is that Splunk> is here to help you with the overall integration and will assist with custom claim rules and any SLO issues that you may run into. - In this step you will need to enter into a PowerShell session. There will need to be a change to specific settings in ADFS due to the Splunk Self Signing Certificate.
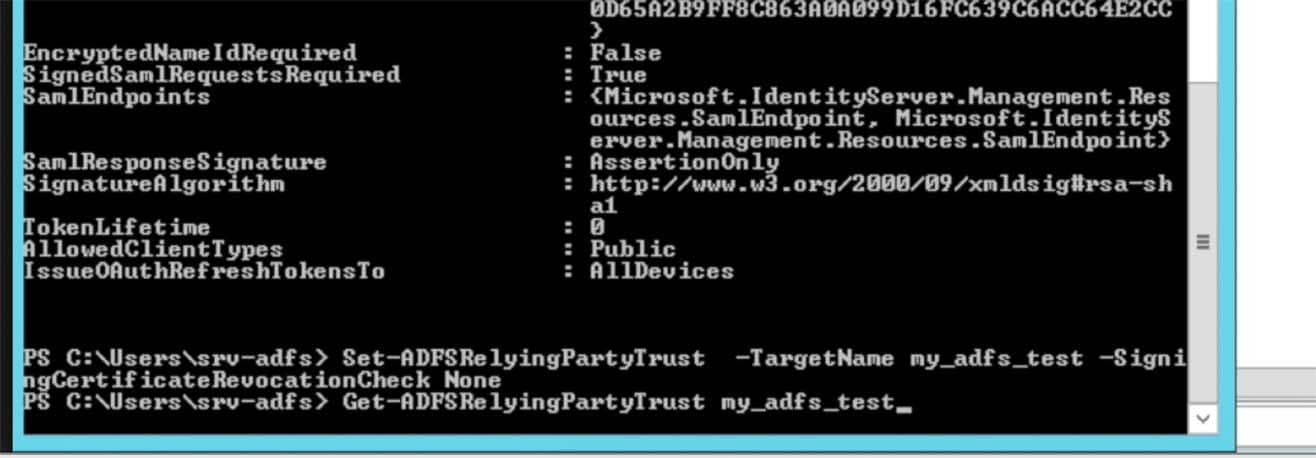
First use the Get-ADFSRelyingPartyTrust <trustname> command to list out the current settings:NOTE: I’ve run into a couple of instances where the ADFS cmdlets were not available in PowerShell on a customer’s system. Although I’ve not personally performed the installation of the role to obtain the ability to run the necessary ADFS commands, and most customers already knew what needed to be done (and to further exasperate the uncertainty here – I’m not an ADFS guru by any stretch of that meaning) there is a decent tech note on the subject here: https://technet.microsoft.com/en-us/library/dn479343(v=wps.630).aspx where it states in order to use the ADFS commands, you need the ADFS Server Role installed:<snip>
To use these cmdlets you must have previously installed the AD FS server role. This can be done using the Add Roles and Features Wizard in Server Manager or optionally, you can use the Install-WindowsFeature AD-Federation-Services cmdlet at a Windows PowerShell prompt to add the role.Once the role is added, you can list all the cmdlets that are available in the AD FS module by using the Get-Command * -module ADFS cmdlet.
</snip> - The setting we need to change is the SigningCertificateRevocationCheck setting. By default it is set to check certificates that are not self signing. We need to set it to None.
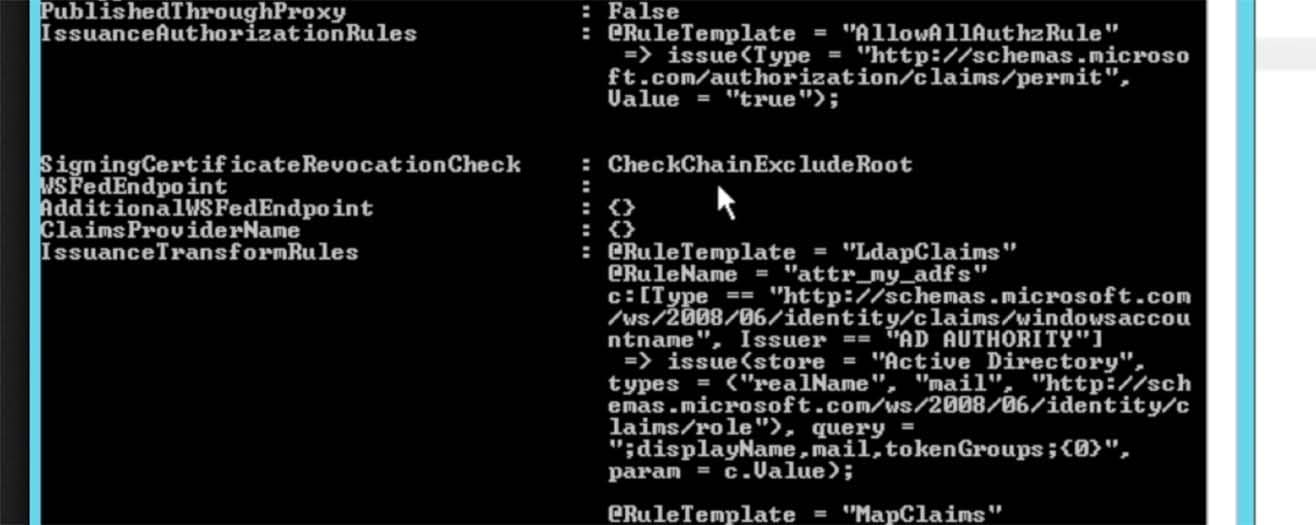
- Use the command Set-ADFSRelyingPartyTrust -TargetName <trustname> -SigningCertificateRevocationCheck None command to change the setting to None:

- Import the Splunk Cloud instance’s certificate into the ADFS Trust Store:
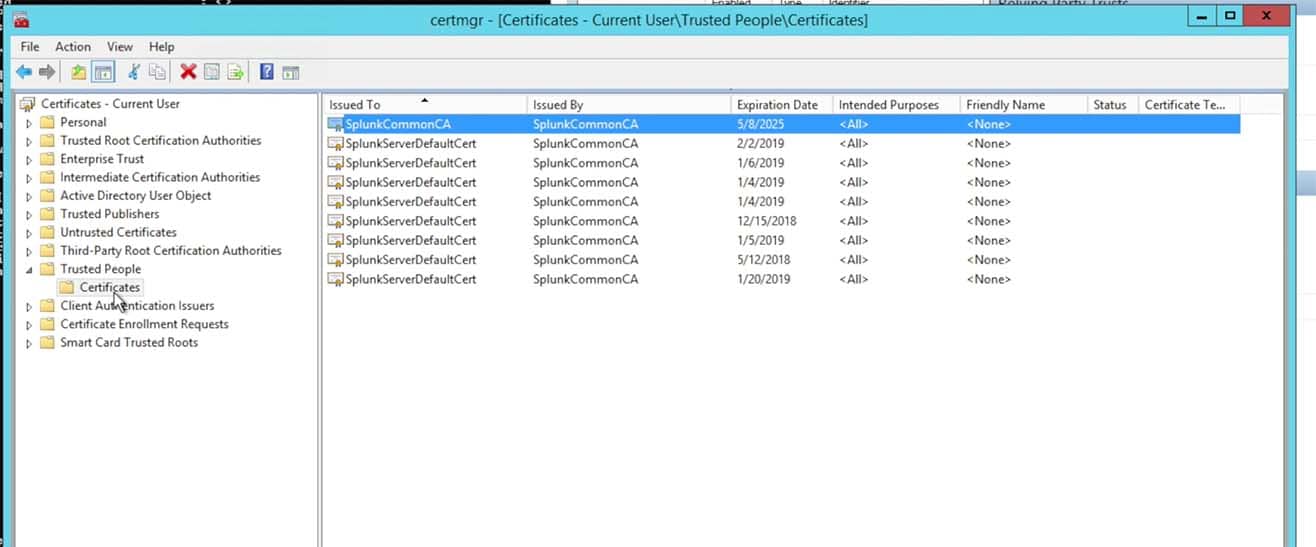
- Choose to import the certificate that you saved from the Splunk Instance’s Metadata into a stand alone certificate file:
NOTE: This has not been required for all customers. We have found that some customers have been required to import the Splunk> search head certificate into the AD server’s trusted chain, where as others have only needed the certificate within the Relying Trust in the ADFS configuration.What I suggest is to bypass this step in the initial setup attempt and only come back to it and import it into the AD server’s chain if required later. If you are unsuccessful in getting Auth requests and responses signed and there is an associated Eventlog message indicating that the certificate doesn’t exist to check the signature, then you may need to add the certificate to your key chain. Try it without doing the import first however, as this is especially helpful for those that have a large AD cluster as the certificate chain may not be replicated between nodes in the cluster – requiring an import onto each individual node in the cluster. In short, you may save some effort/time/work/management overhead if it ends up not being needed.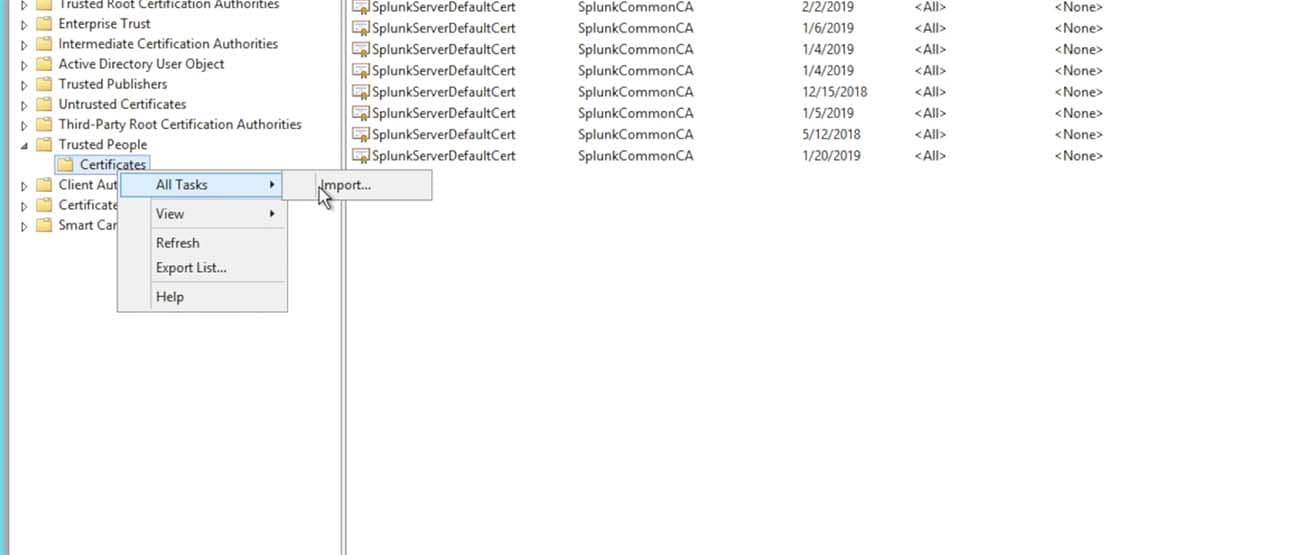
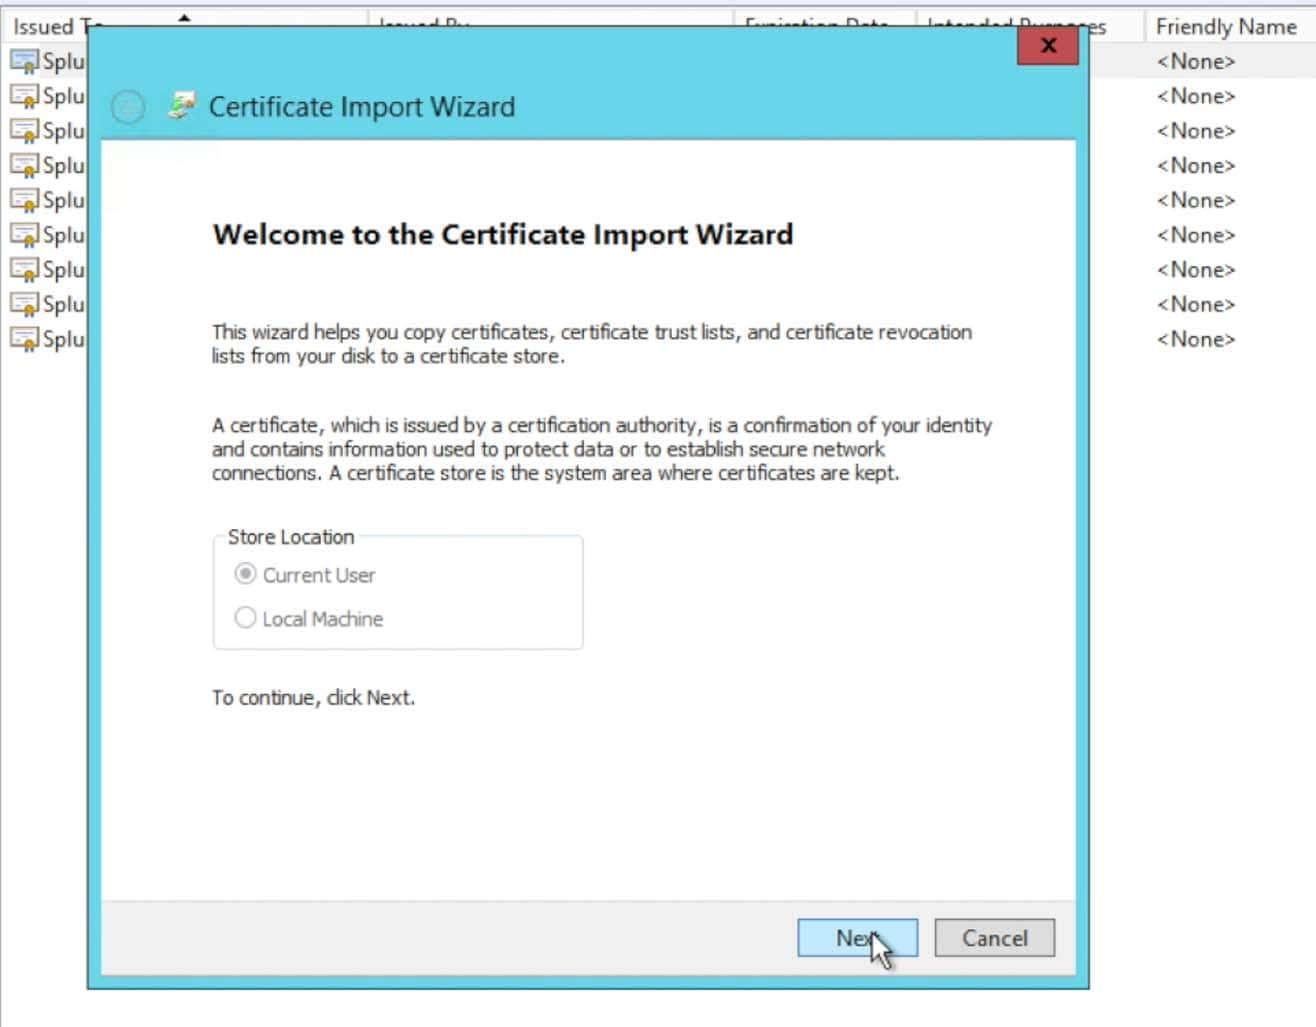
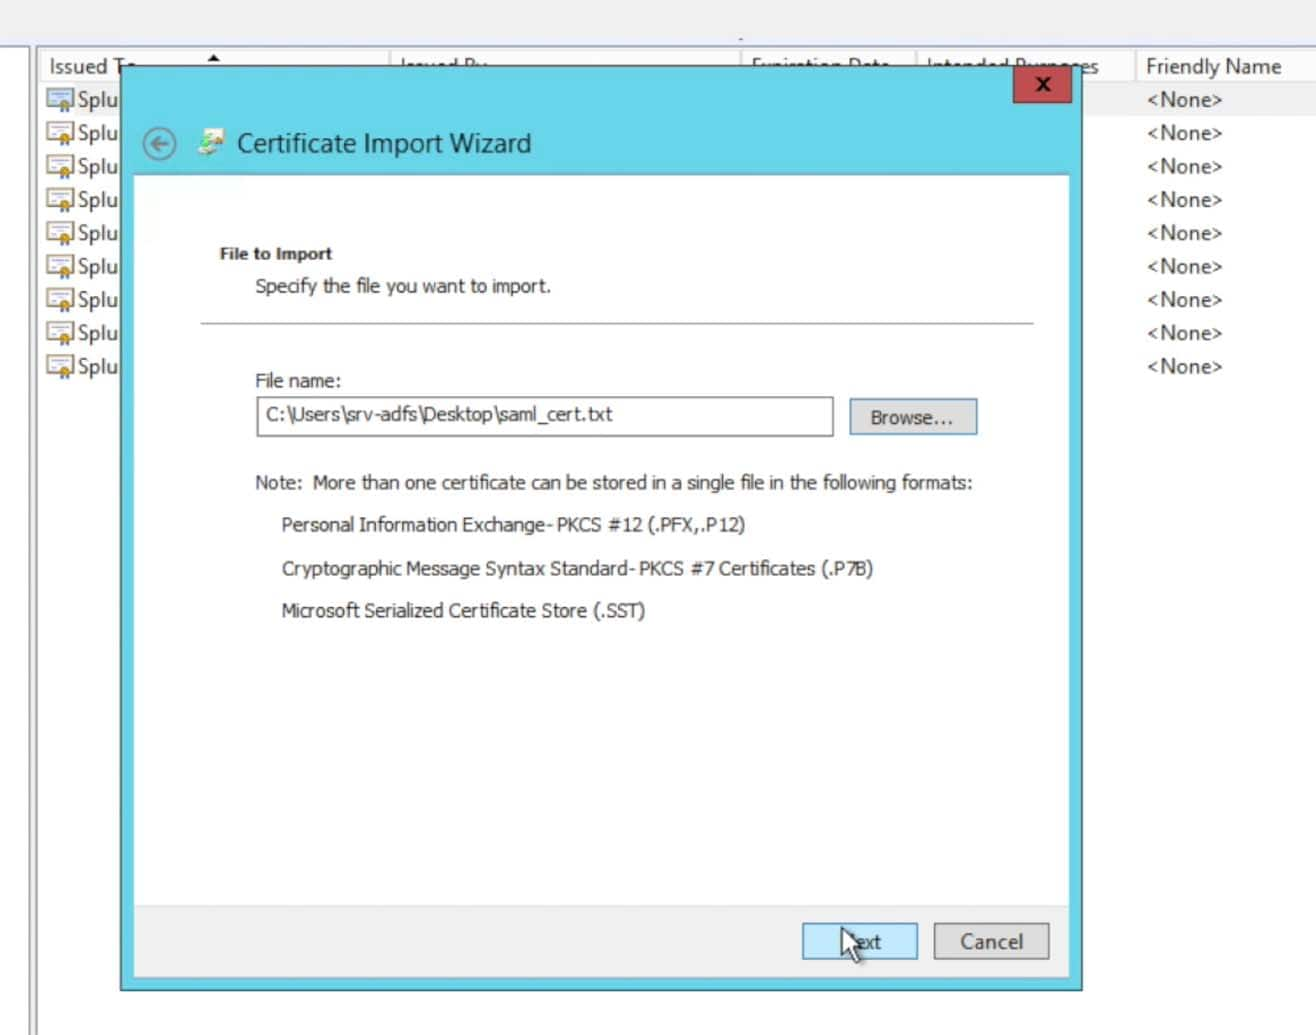
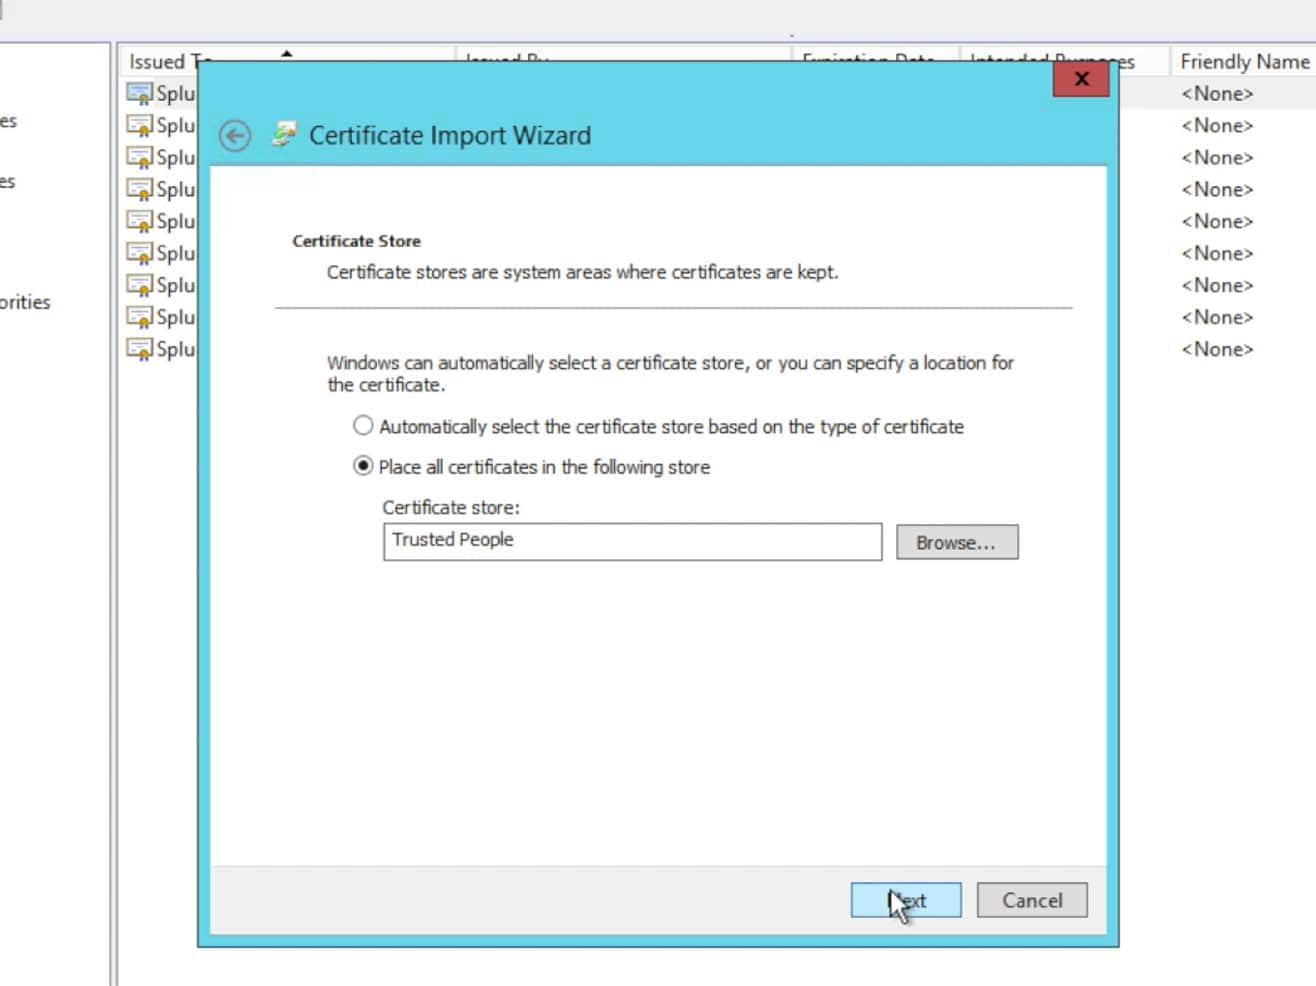
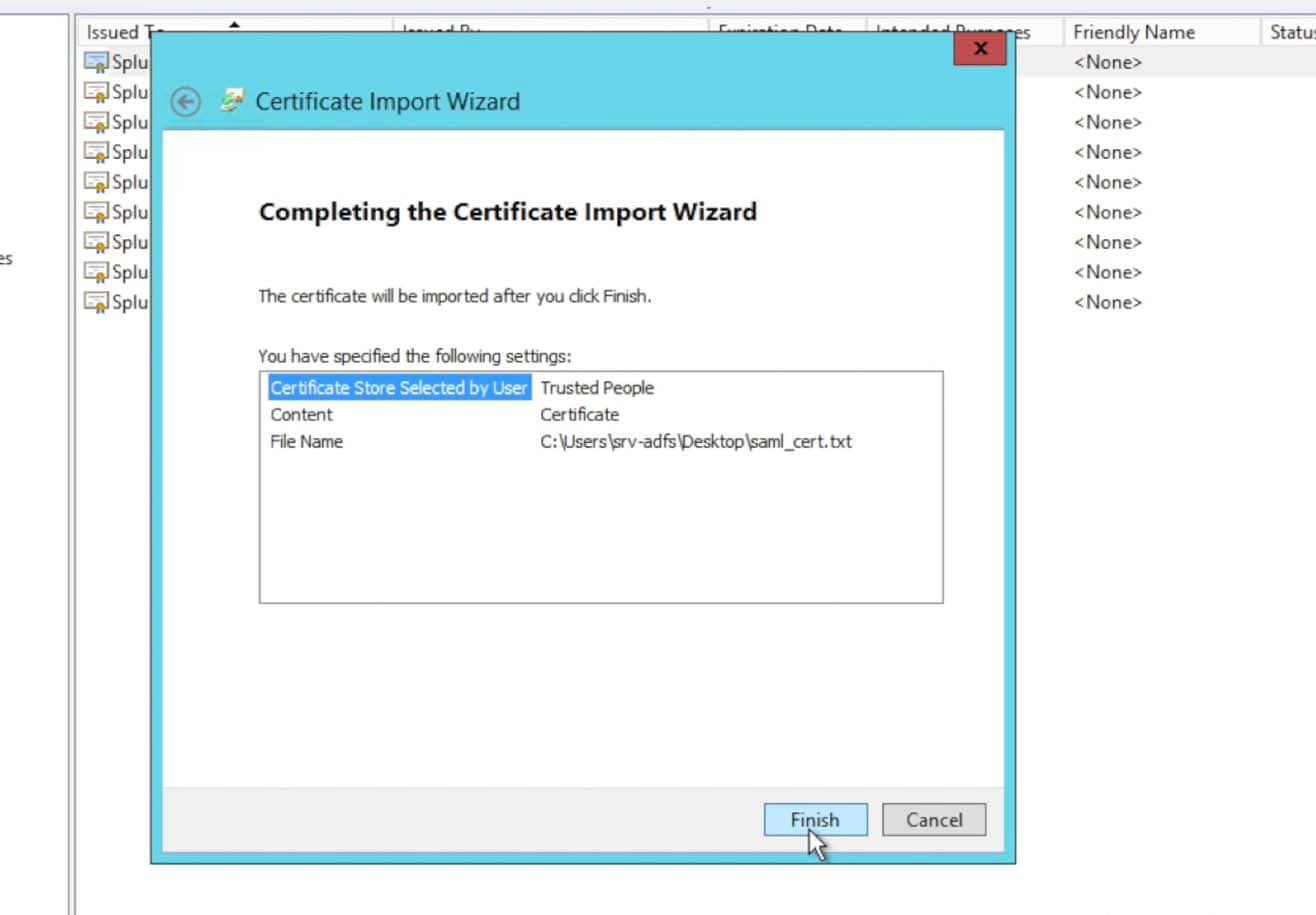
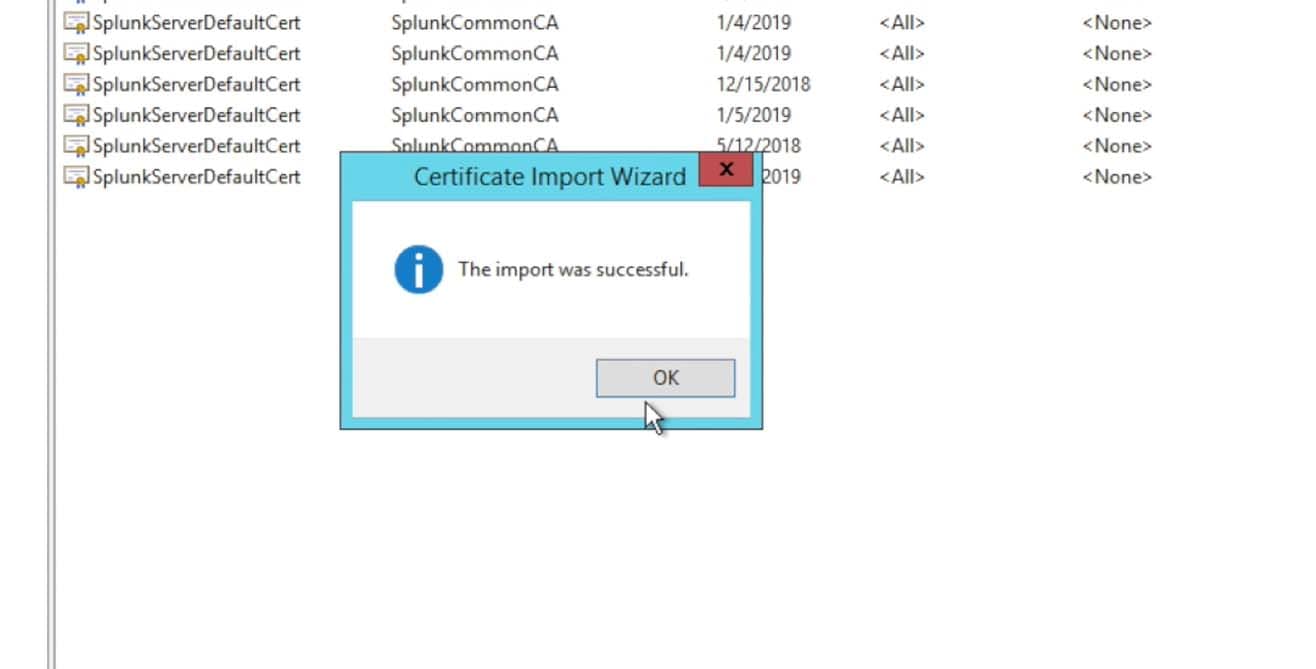
Once you received the import was successful dialogue, you are finished with importing the certificate.
- Obtain the ADFS metadata from your Relying Trust to be imported into Splunk:
Go to the ADFS->Endpoints option within ADFS:
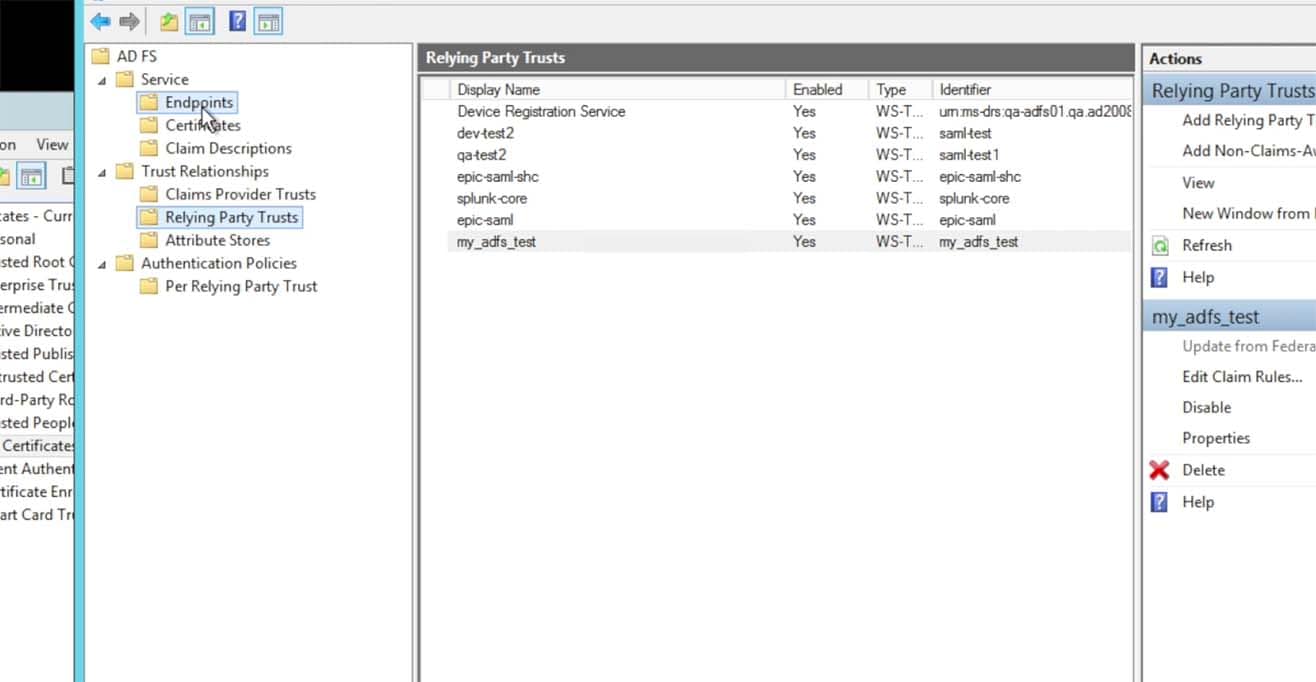
- Locate the FederationMetadata URL in the Metadata section.
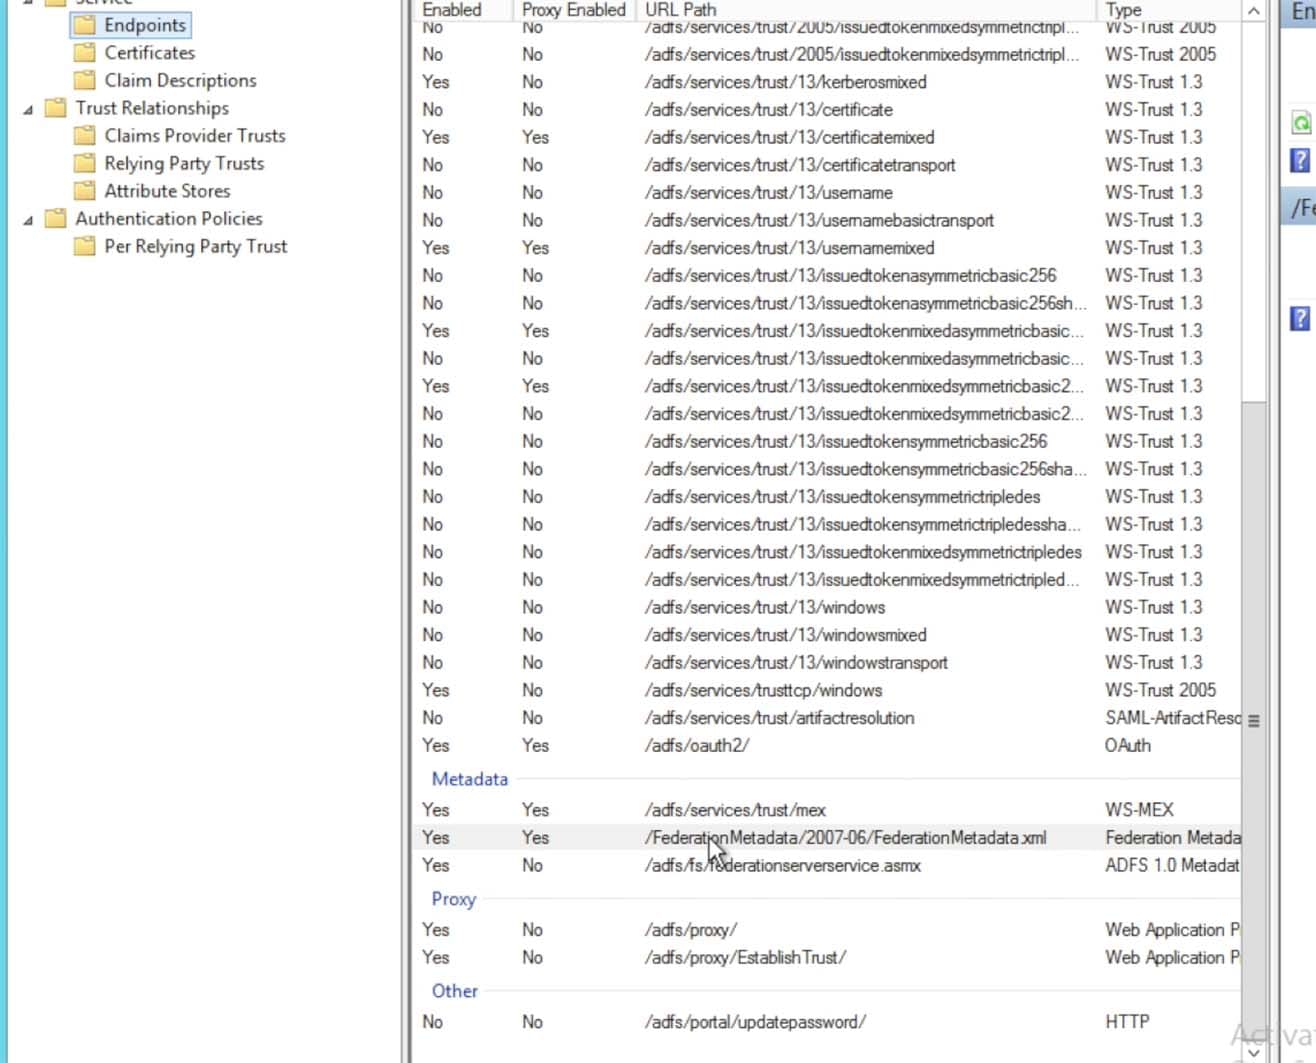
- This URL can then be accessed via a browser to download/save the XML metadata into a file:
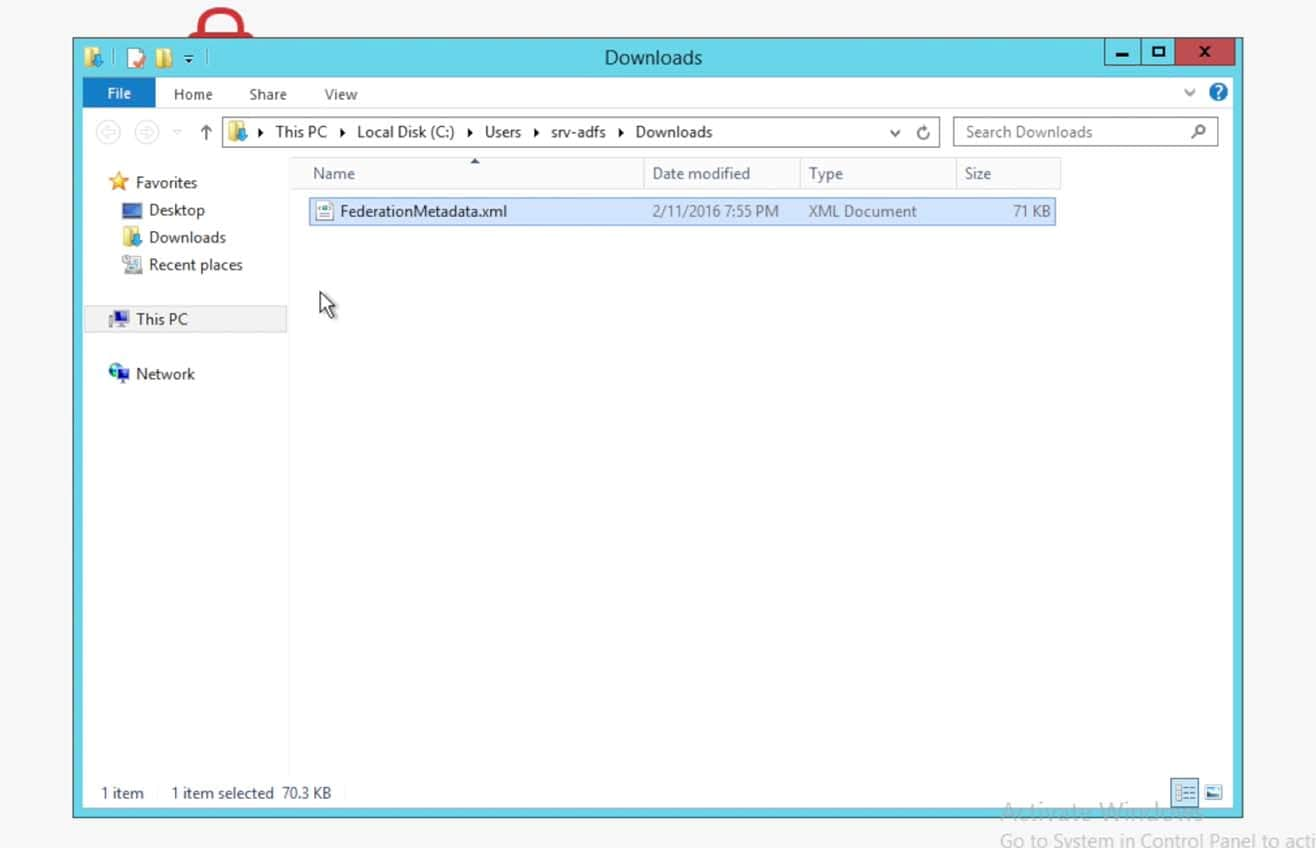
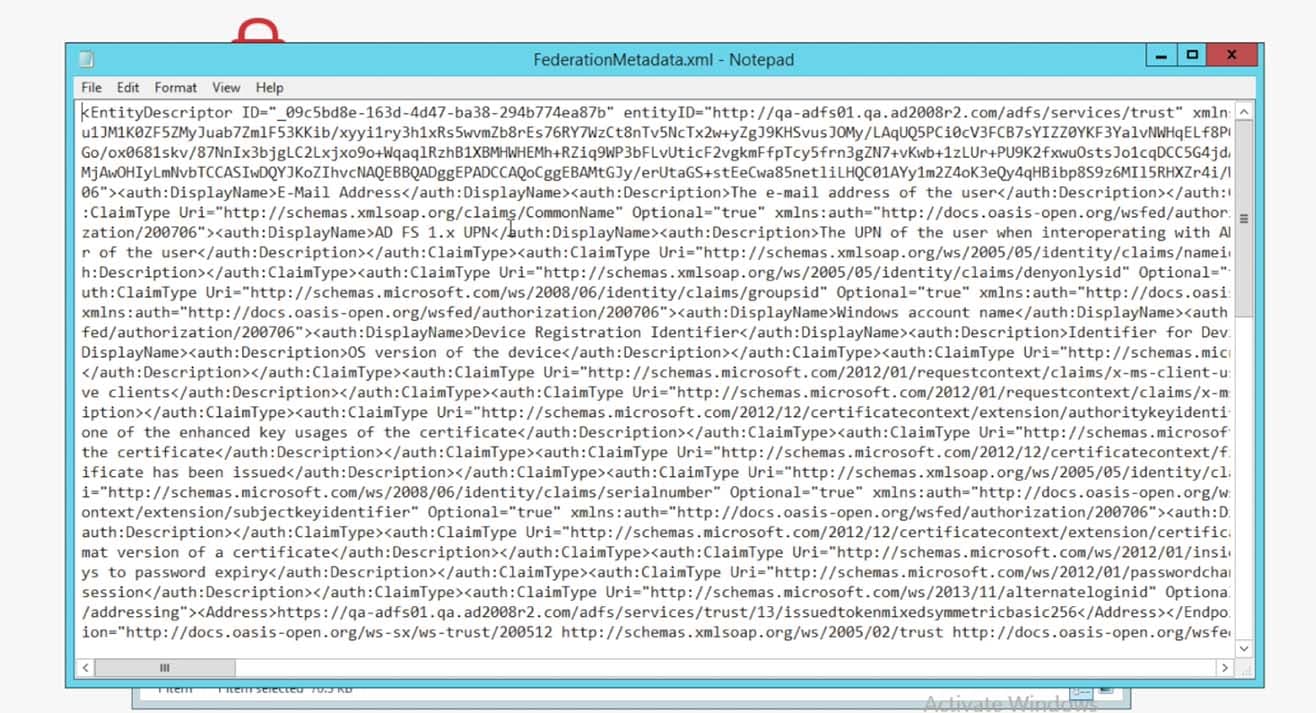
Save the XML metadata into a file on your desktop. It will be used to upload into Splunk> in the following steps.
Configure Splunk>
- On the Splunk instance as an Admin user, choose Settings->Access Controls->Authentication Method. Choose SAML then click on the ‘Configure Splunk to use SAML’ button.
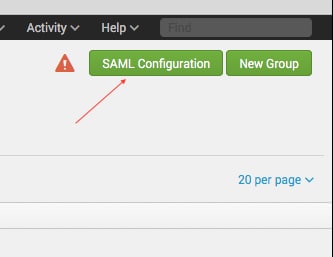
within the SAML Groups setup page in Splunk, click on the SAML Configuration button in the upper right corner.
- The SAML Configuration popup window will appear. Click on Select File to import the XML Metadata file (or copy and paste the contents into the Metadata Contents textbox) and click Apply.The following fields should be populated by the metadata:
Single Sign On (SSO) URL
Single Log Out (SLO) URL
idP’s Certificate file
Sign AuthnRequest (checked)
Sign SAML response (checked)
Enter in the Entity ID as ‘splunk-acmecorp‘ as was used in previous sections within step 11 of the ADFS configuration (above).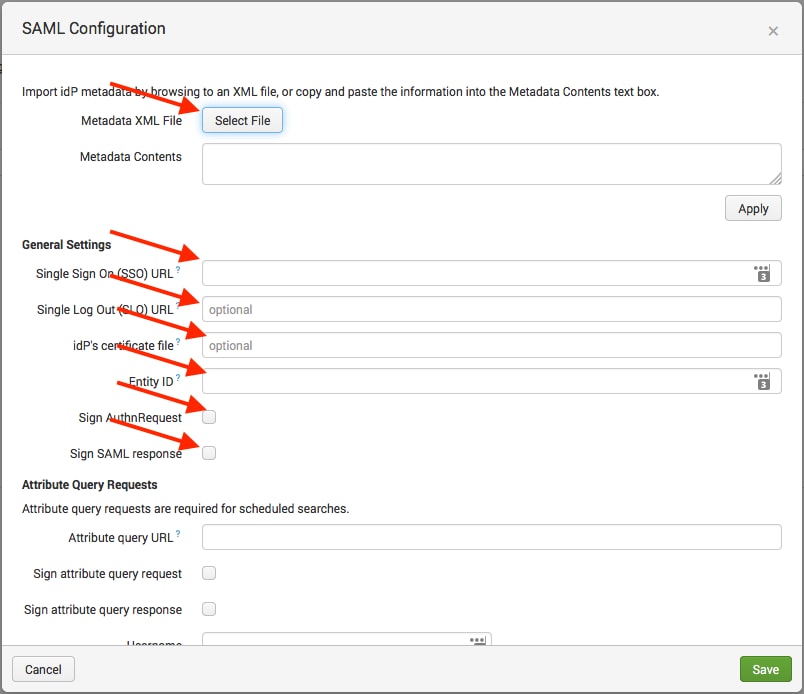
NOTE: If you set signing of the Auth Requests and Responses, then ADFS also will need to be set to enable/disable signing. One way to just test if SAML is working without any certificates in the mix is to disable signing of Requests and Responses on both the ADFS side and the Splunk> side. Then once you have SAML working, the NameID and all attributes flowing as you expect, then later enable signing of the Requests and Responses. This is especially helpful when 3rd party signed certificates are in the mix. First get SAML working, then have Splunk> Ops put the certificate chain into place on the search head(s) and enable signing. - Scroll down to the ‘Advanced Settings‘ section.
Enter in the Fully Qualified Domain Name (FQDN) of the Splunk Cloud instance – ‘https://<customername>.splunkcloud.com
Enter a ‘0‘ (zero) for the Redirect port – load balancer’s port.
Set the Attribute Alias Role to ‘http://schemas.microsoft.com/ws/2008/06/identity/claims/role’
It may also be necessary to set an Attribute Alias for ‘Real Name’ and ‘Mail’ – but not all implementations require these settings.Click Save to Save the configuration:
 For the ‘Attribute Alias Real Name’ and ‘Attribute Alias Mail’ there may need to be an associated schema string added such as the ‘Attribute Alias Role’ (which has always been needed). There is a decent Microsoft Tech Net posting here https://technet.microsoft.com/en-us/windows-server-docs/identity/ad-fs/technical-reference/the-role-of-claims that describes some of the URI’s for various schema names. You would need to perform a SAML trace in a SAML Tracer Plugin for your browser after setup of Splunk. Doing so will then allow you to see the full assertion XML text and within it, see which schema names are being passed with the values you wish to utilize for the ‘realName’ and ‘mail’ attributes that Splunk utilizes.
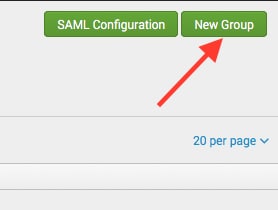
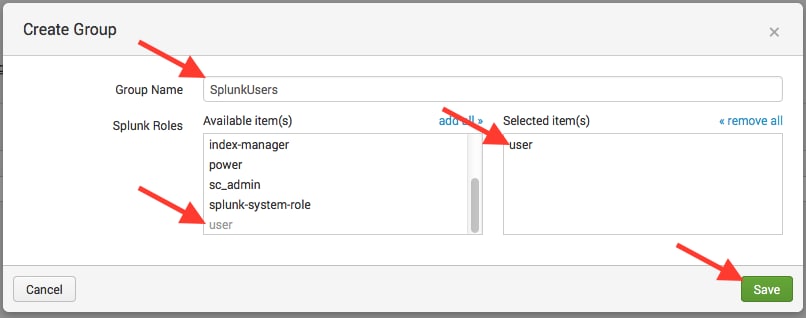
 - The next step is set up the SAML groups. Within the Splunk ‘Settings->Access Controls->Authentication Method->SAML Settings‘ page, click the green “New Group” button
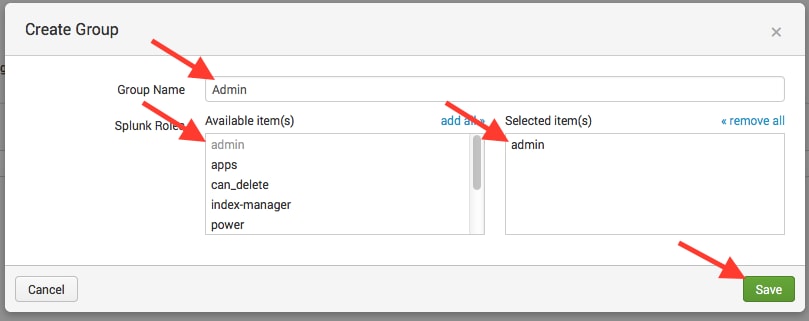
- Enter in a group name that associates with ADFS Active Directory passed group names, some examples follow
- Test the ADFS SAML configuration. Log into the environment through a clean browser session or an incognito browser session.NOTE: If you need to bypass ADFS authentication re-direct and get to the local Splunk user/pass auth screen, use the customer’s URL: https://<customer>.splunkcloud.com/en-US/account/login?loginType=splunk
- Also test logging out of Splunk, you should be re-directed to the Splunk SAML logout page as shown below:

----------------------------------------------------
Thanks!
Philip Greer
Related Articles
About Splunk
The world’s leading organizations rely on Splunk, a Cisco company, to continuously strengthen digital resilience with our unified security and observability platform, powered by industry-leading AI.
Our customers trust Splunk’s award-winning security and observability solutions to secure and improve the reliability of their complex digital environments, at any scale.

